Some important context which lays the groundwork for this project:
Like any good wannabe-producer, I have committed myself to getting to grips with the production management software Flow – or Shotgrid, as many still call it (or even Shotgun for some!). The bulk of this took place during my major specialisation module in my final year of university, during which I produced eleven projects for eleven different students. Whilst this provided a good challenge (which you can read about here) I will be the first to admit that there were issues with how I went about it. I taught myself how to use the software, rushing to get each person’s sequence set up so that I could begin producing it, and then figured out better, more efficient ways of doing things along the way.
I believe mistakes are important – they provide an opportunity to learn. As such, I decided to set up a new Flow project for a hypothetical production which fixed all the mistakes I had made in my previous one. Thus, the Space Sweepers x Tangled trailer was born…
The Birth of Space Sweepers x Tangled: The Trailer

Artwork by Lilian Han Morze.
Tangled (Nathan Greno & Bryon Howard): internationally acclaimed, much-loved Disney adaptation of the tale of Rapunzel.
Space Sweepers (Lilian Han Morze): a 4 minute comedy film I produced in my second year of university about two aliens cleaning a spaceship.
Naturally these should be combined, right?
The story behind this unlikely mash-up is that I wanted to create a new-and-improved Flow project which would still allow me to work on something for which I already had assets. Space Sweepers fits this bill and is also mixed-media, with 2D character animation and CGI backgrounds and prop animation, so I would be able to explore both 2D and CGI pipelines. I would be completing this project around university work and didn’t have the time to plan out a whole short film, so settled on the idea of this hypothetical project being a trailer. However, Space Sweepers actually already has a trailer – one which, for practicing Flow (the whole purpose of the exercise), isn’t entirely suitable as it doesn’t utilise sequences, amongst other things. This simply would not do! I wanted to structure this new project with full sequences, different environments, scripted lines, etc as a way to push my understanding of using Flow. So, after a google for pre-existing trailers to base this new version of the Space Sweepers trailer on, I arrived at Tangled: the shortest trailer I could find at 40 seconds. I combined some sequences from Tangled’s trailer with some pre-existing space-sweepers trailer, et voila: a 30-second in-progress trailer for me to build a Flow project around and better learn how to use the software.
Setting Up the Project
First, I broke down every shot into assets and tasks. Then, I created a new task template for the shots that was appropriate for their 2D-3D mixed media nature. I then imported these to the Flow project, with every sequence having linked shots which, in turn, had linked assets, some of which had sub-assets too, and so on. I made sure everything had a description, and that the shots all had frame counts. Essentially, I tried to make everything much more detailed than in my aforementioned initial Flow project.
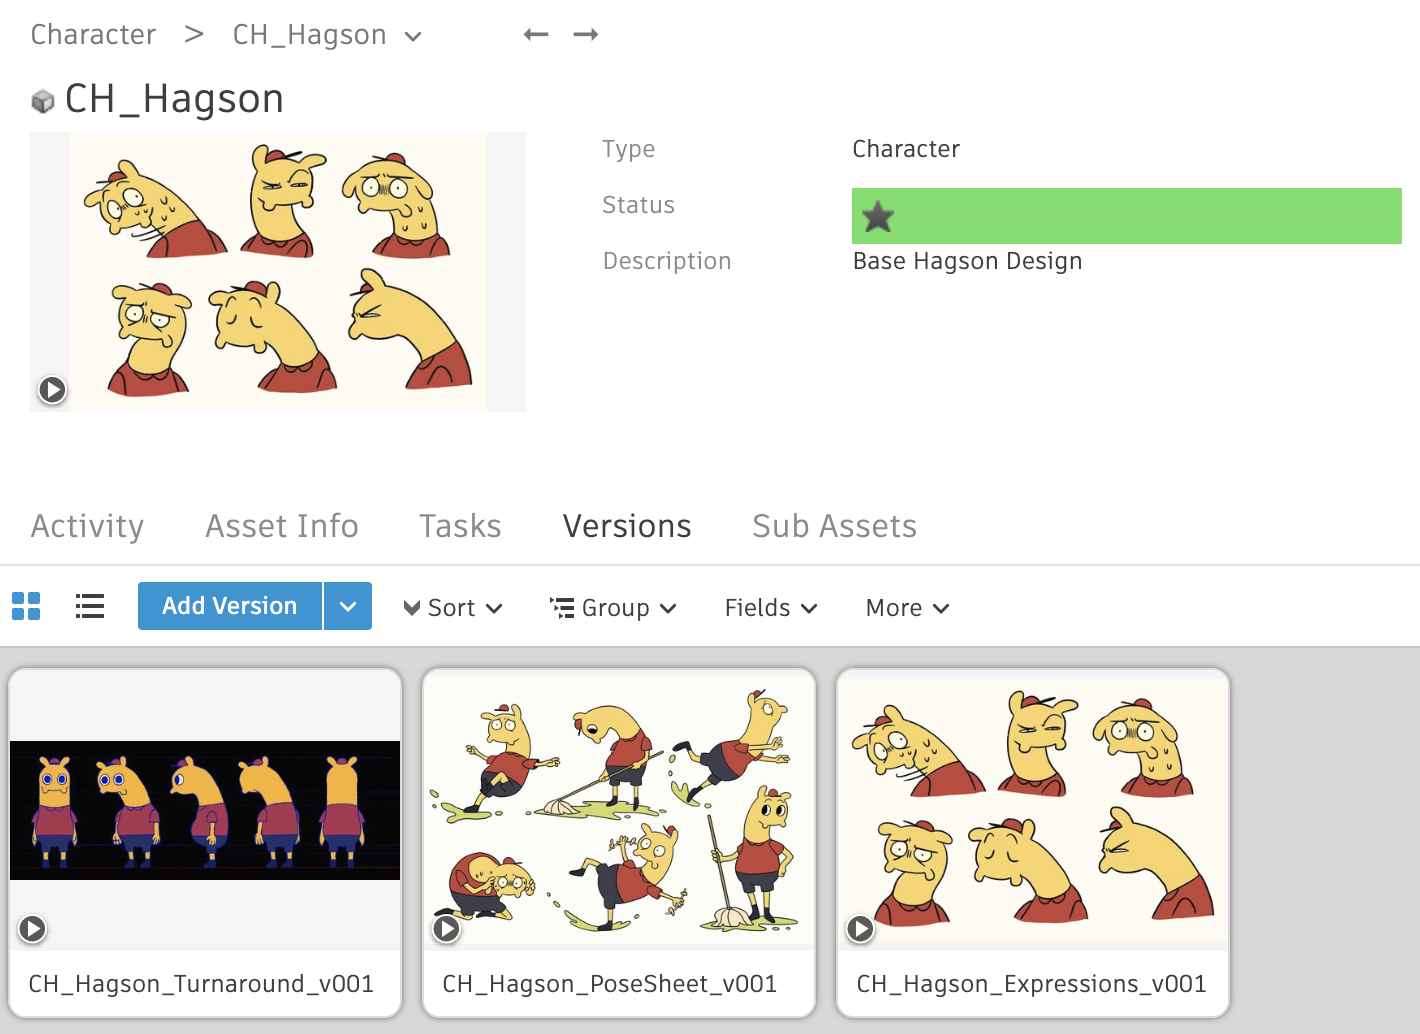
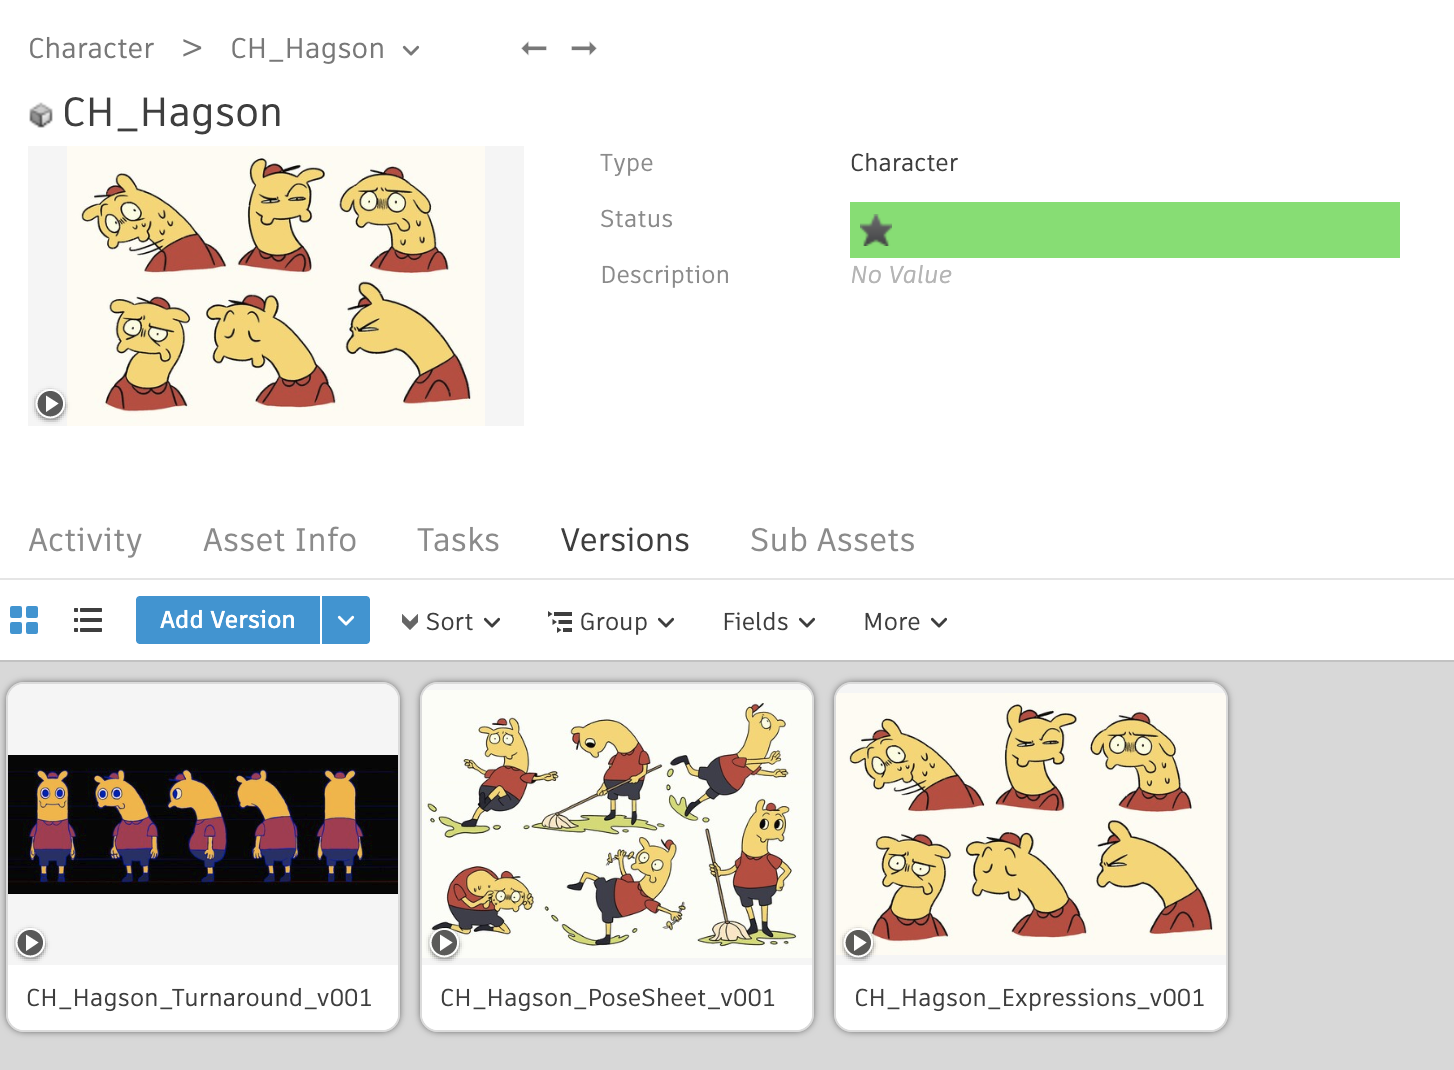
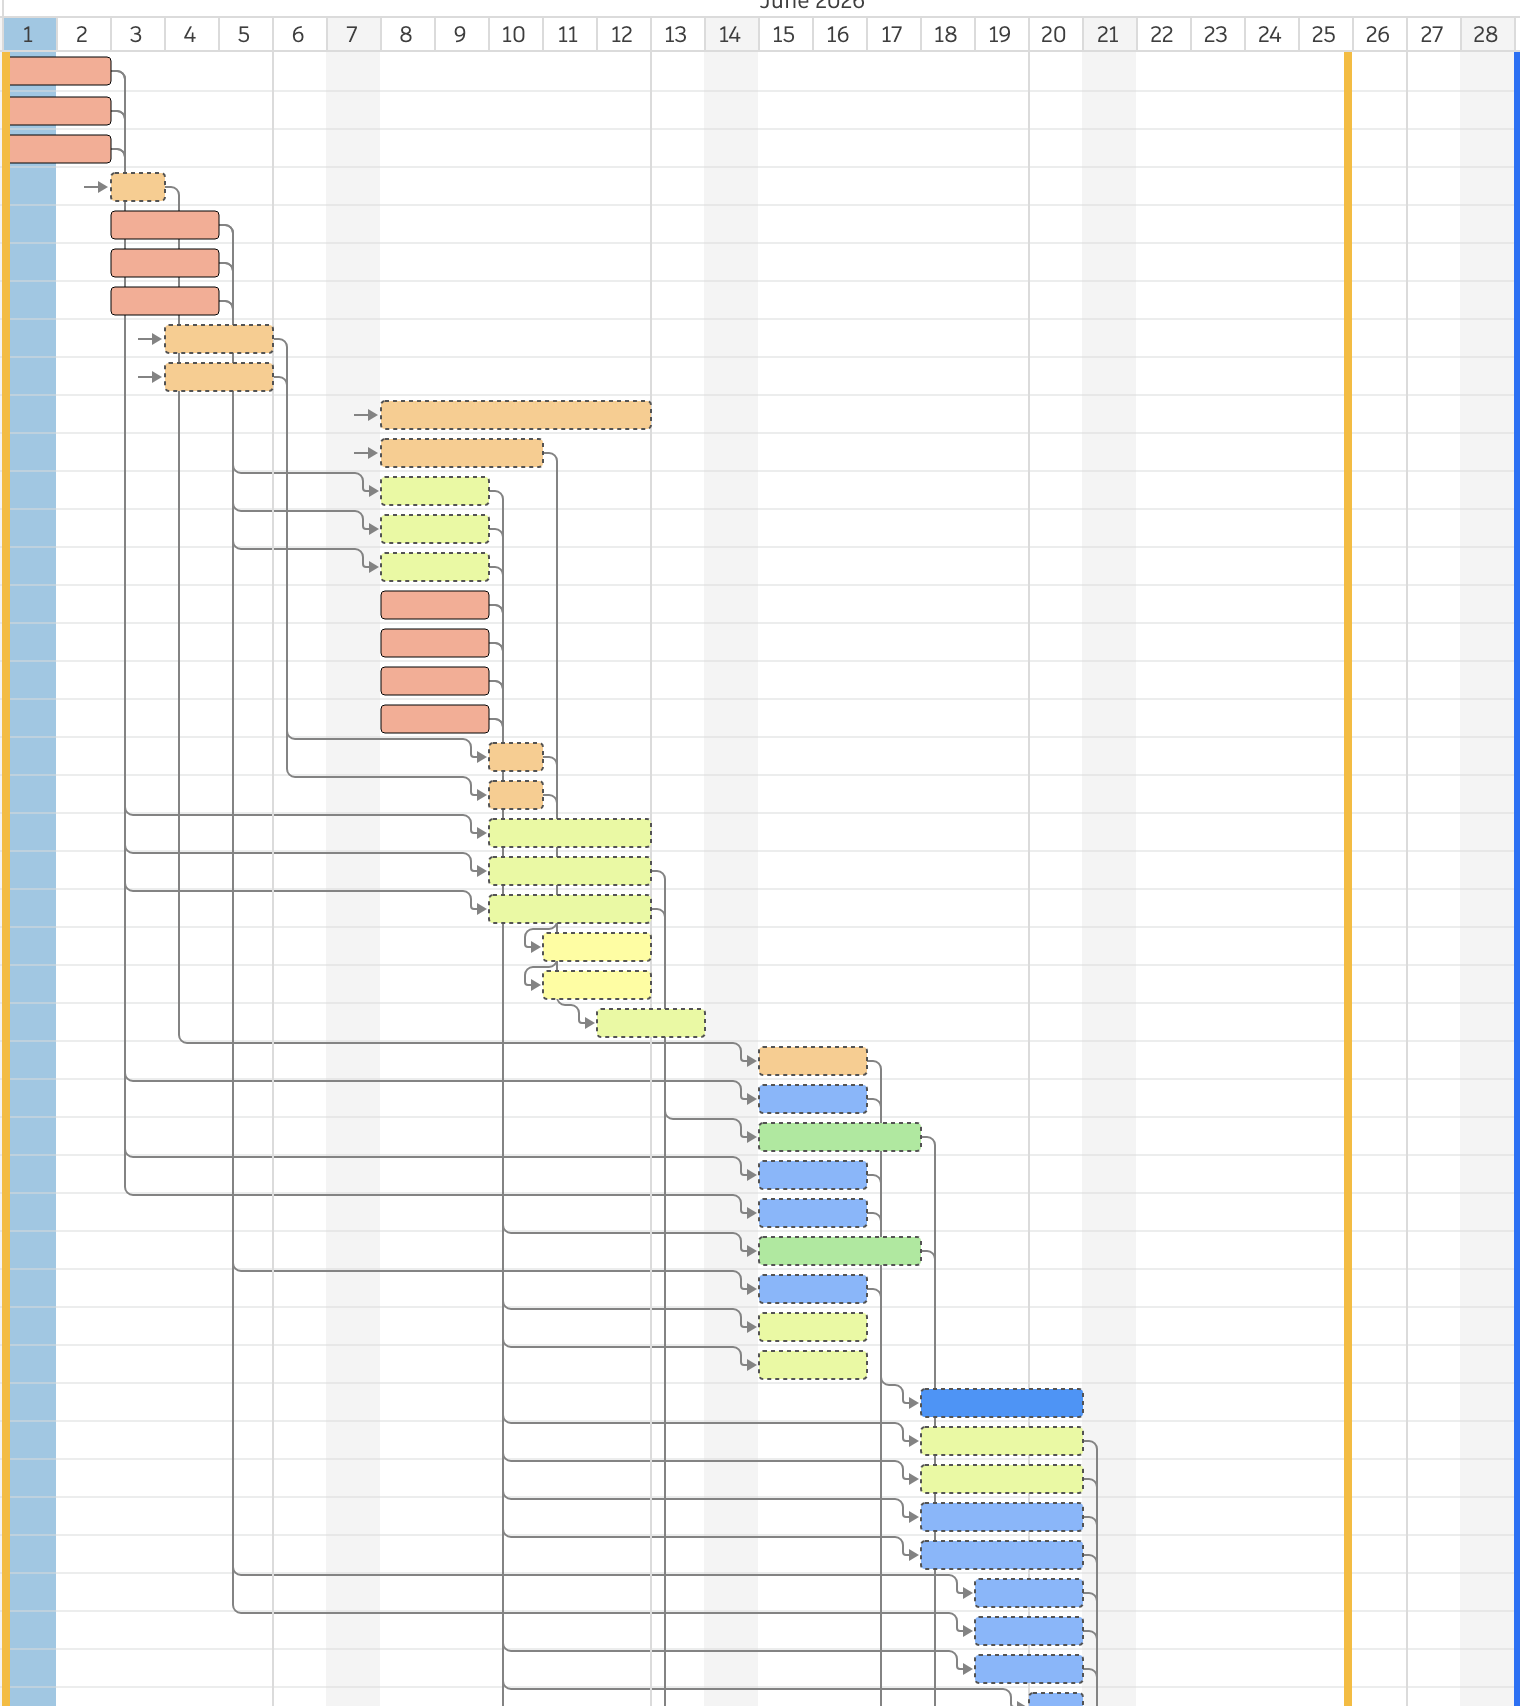

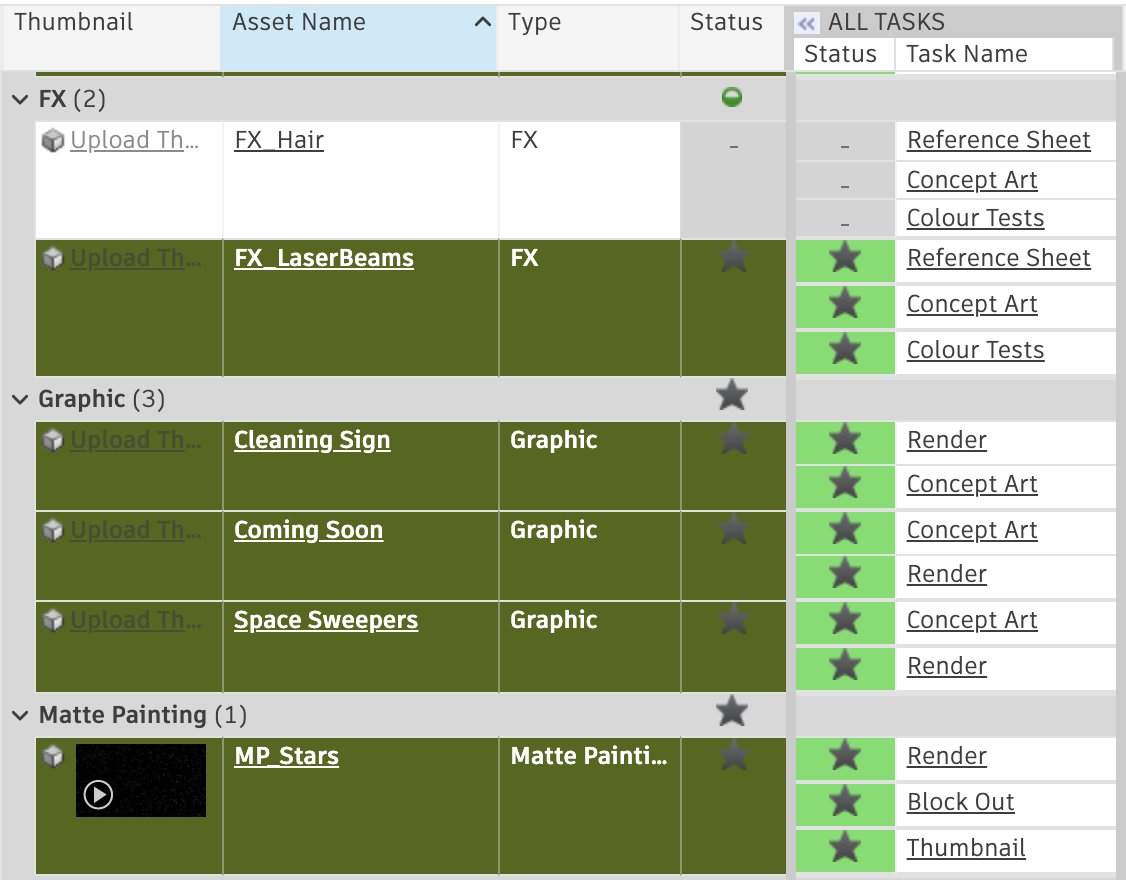
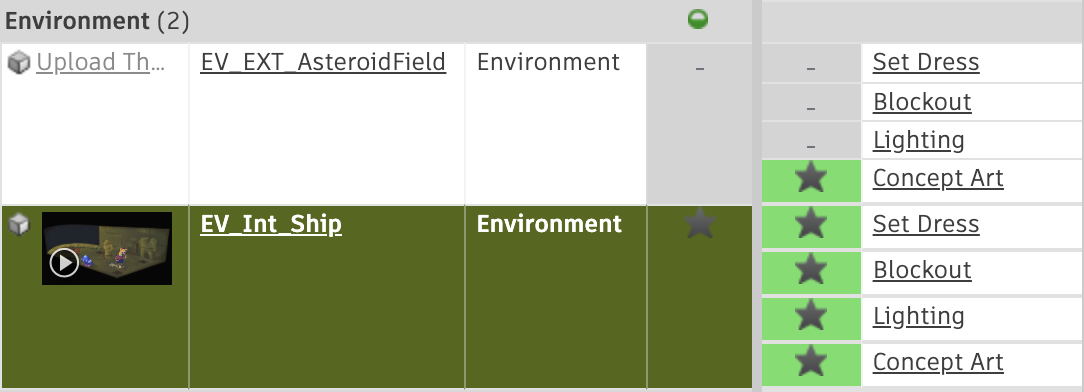
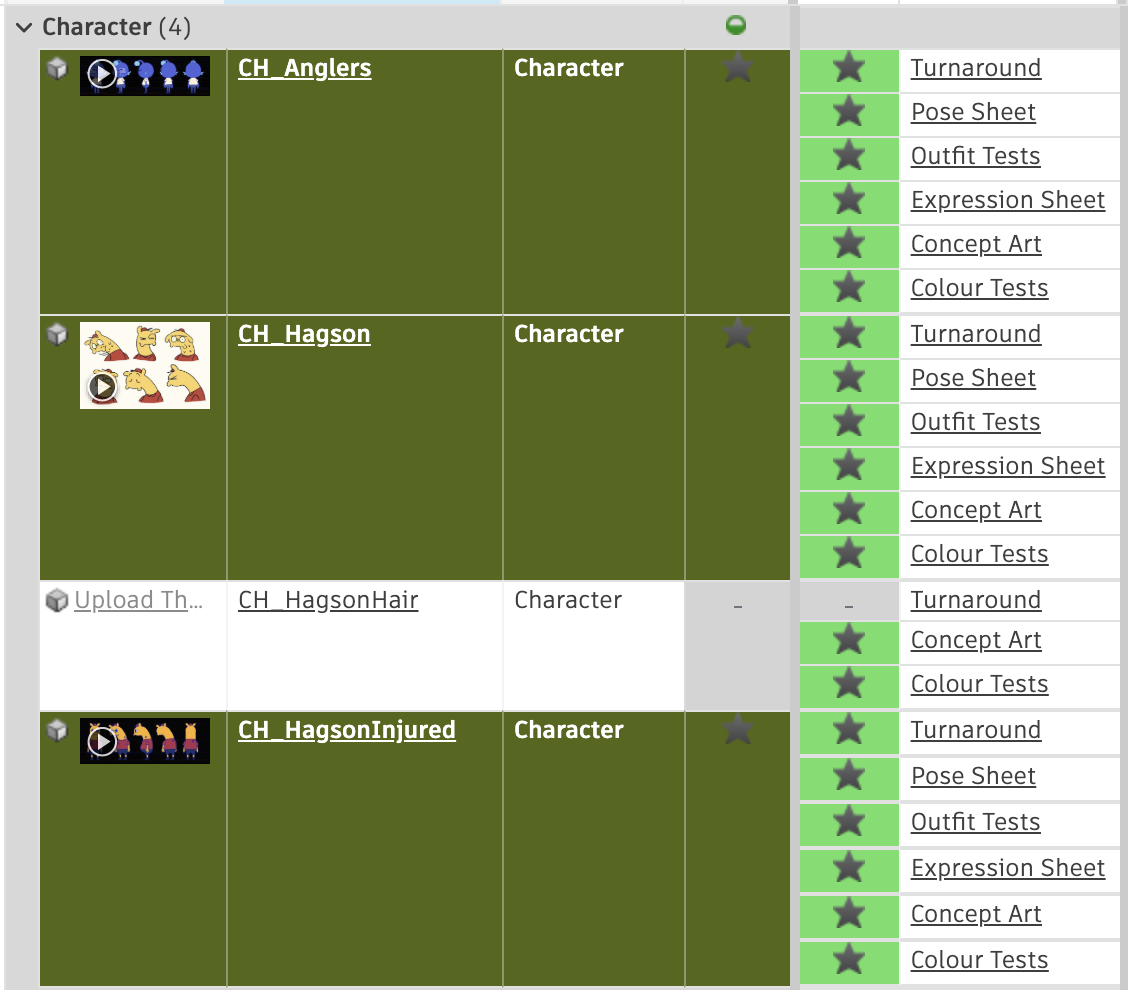
I also set up a project details page to track the progress of all these areas and to give a quick overview of the project’s current state.
Considerations Before Scheduling
So, with everything logged in the project, I had to schedule it. Since the components of the trailer taken from the actual Space Sweepers film were already finished, I only scheduled the remaining work to be done, namely sequences 2 and 3, the two Tangled-inspired sequences I invented for this exercise. I excluded scheduling any already completed work, such as environments and character turnarounds we had already completed for Space Sweepers.
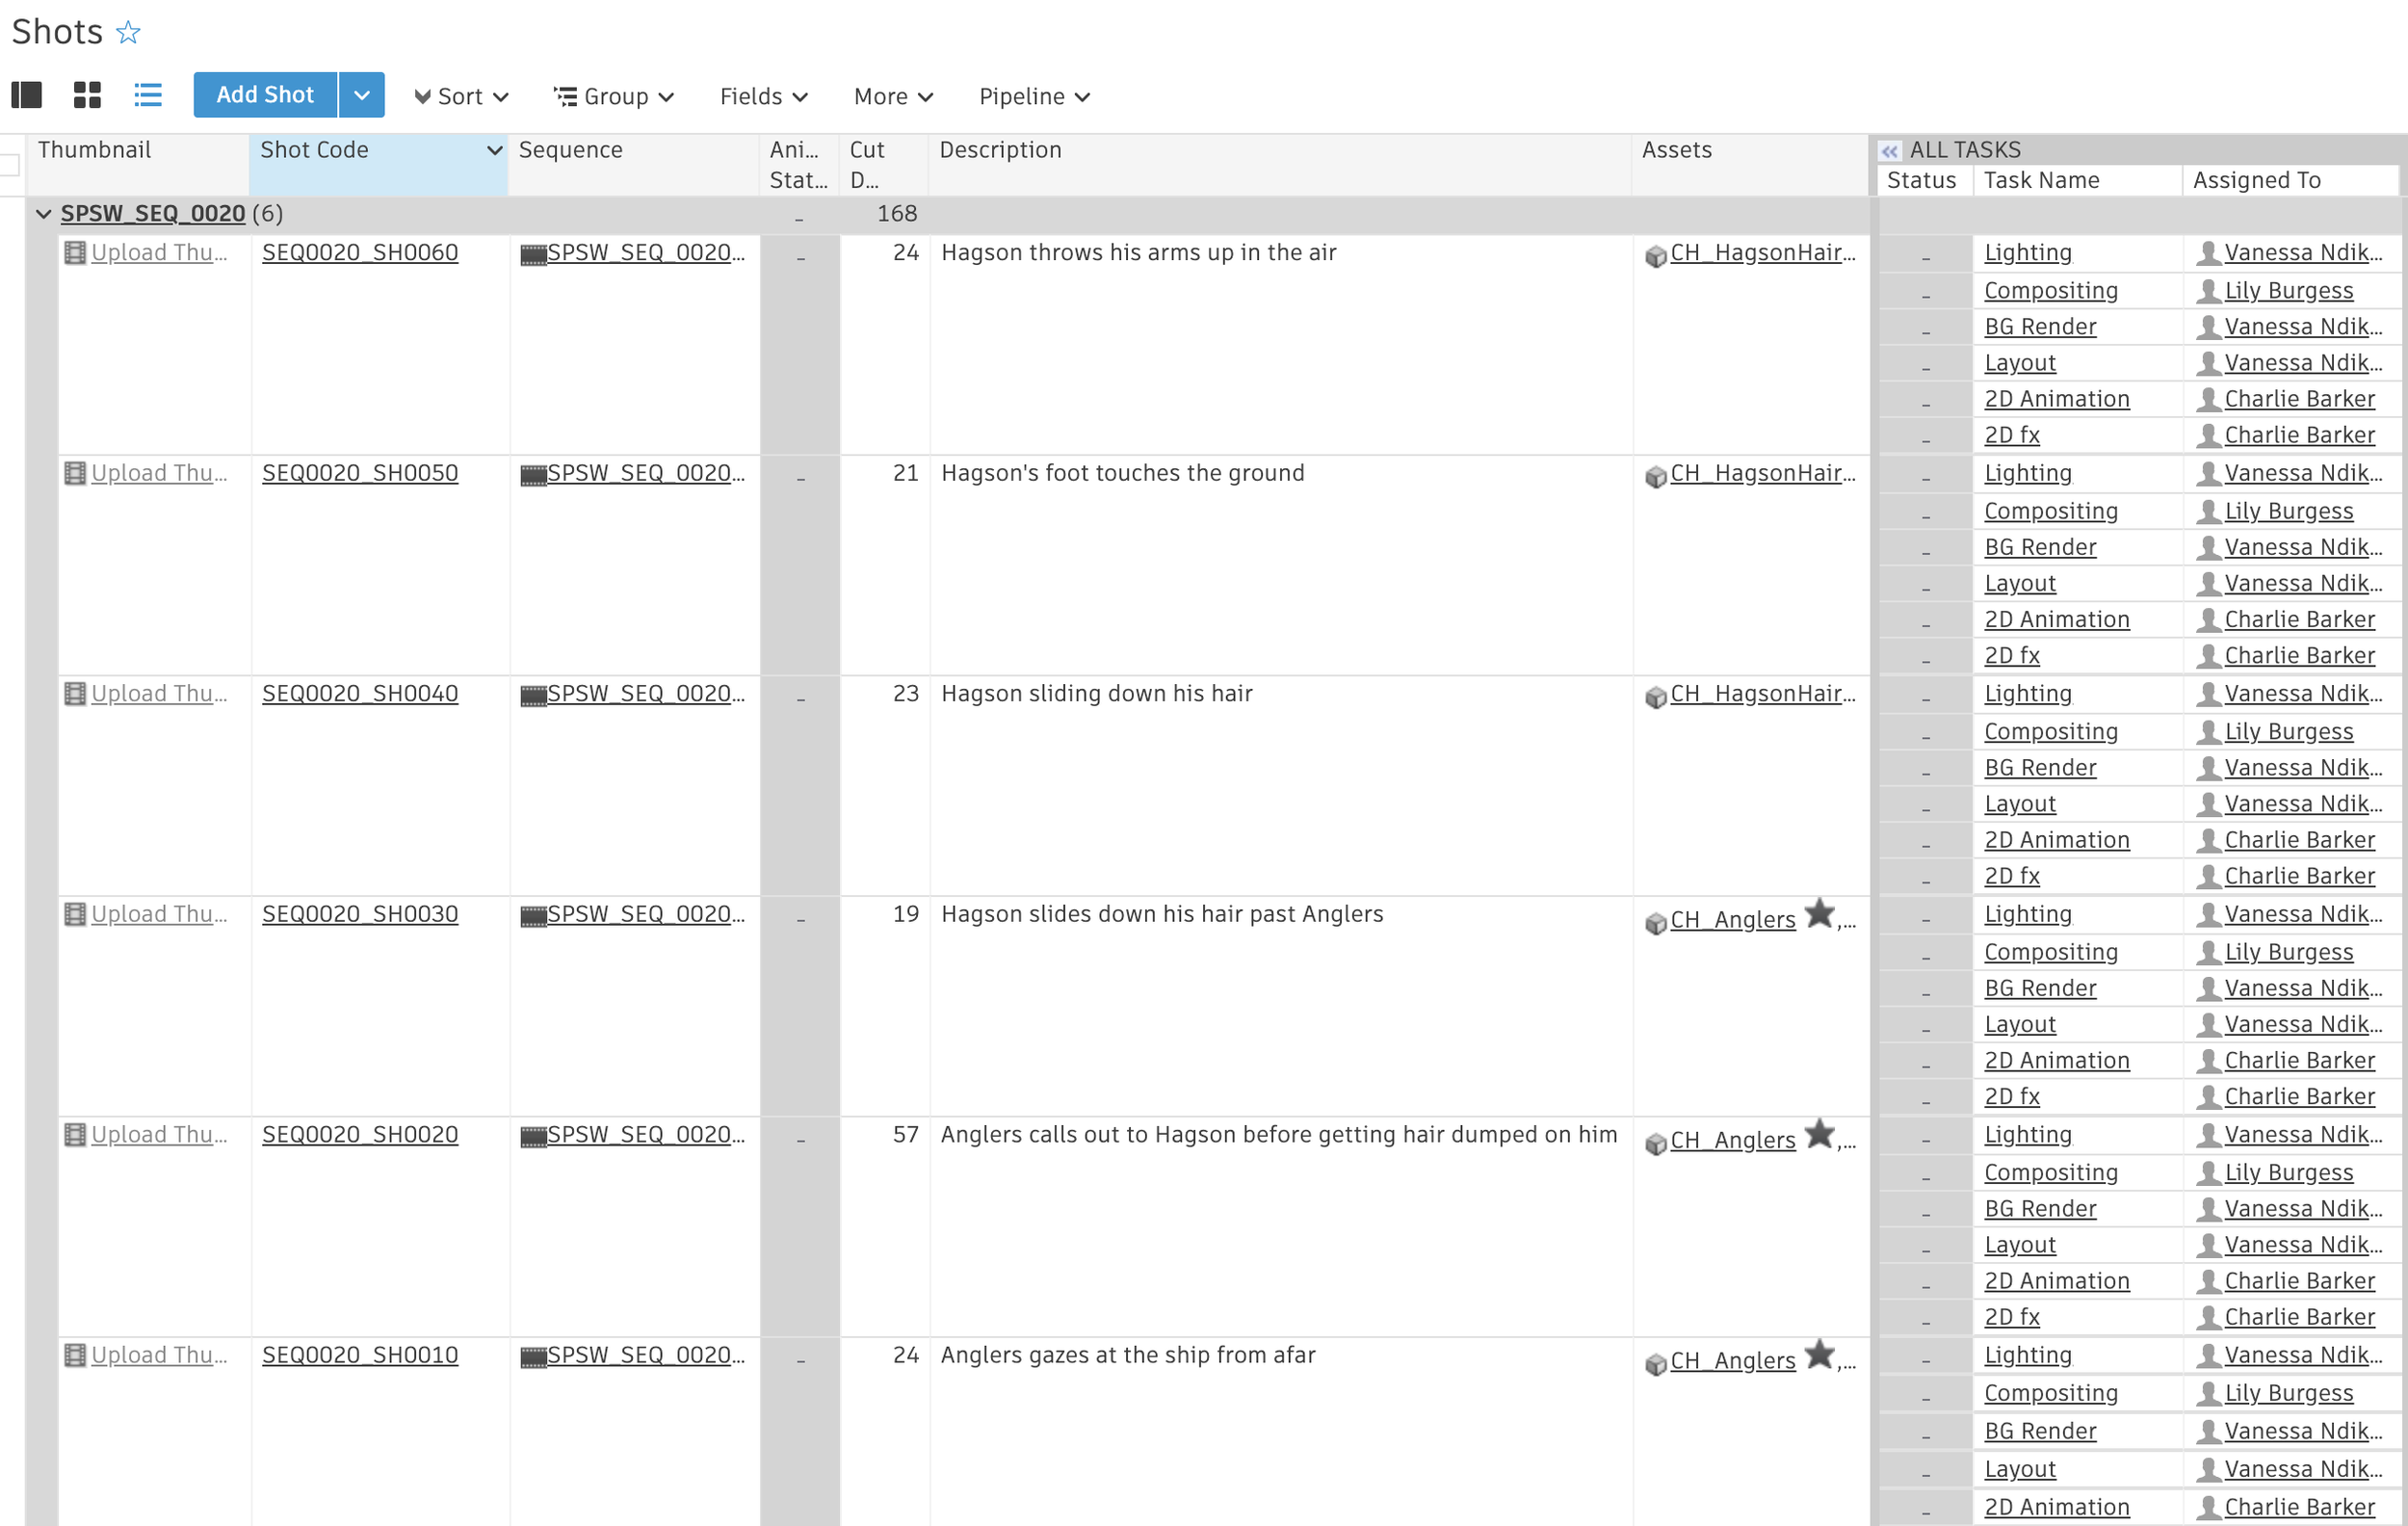
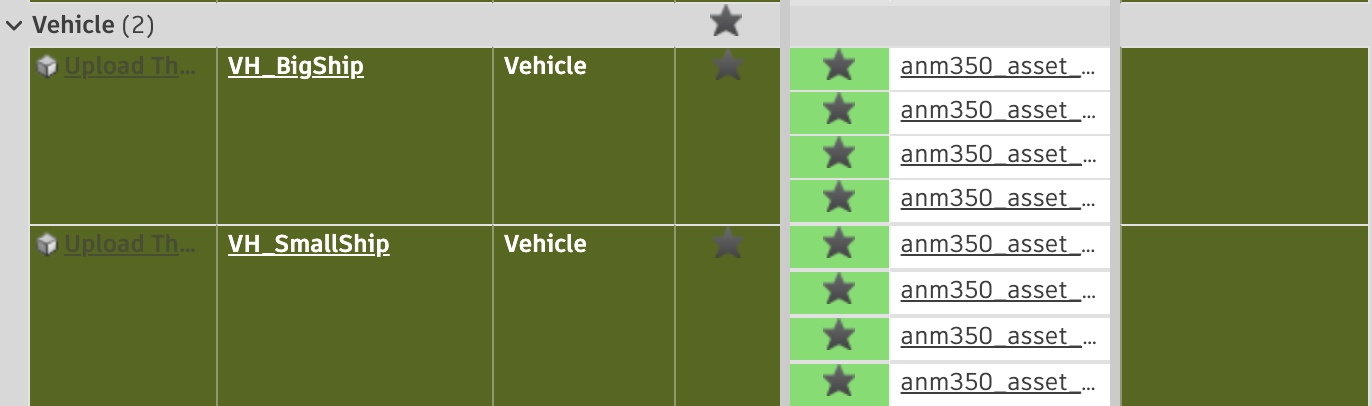
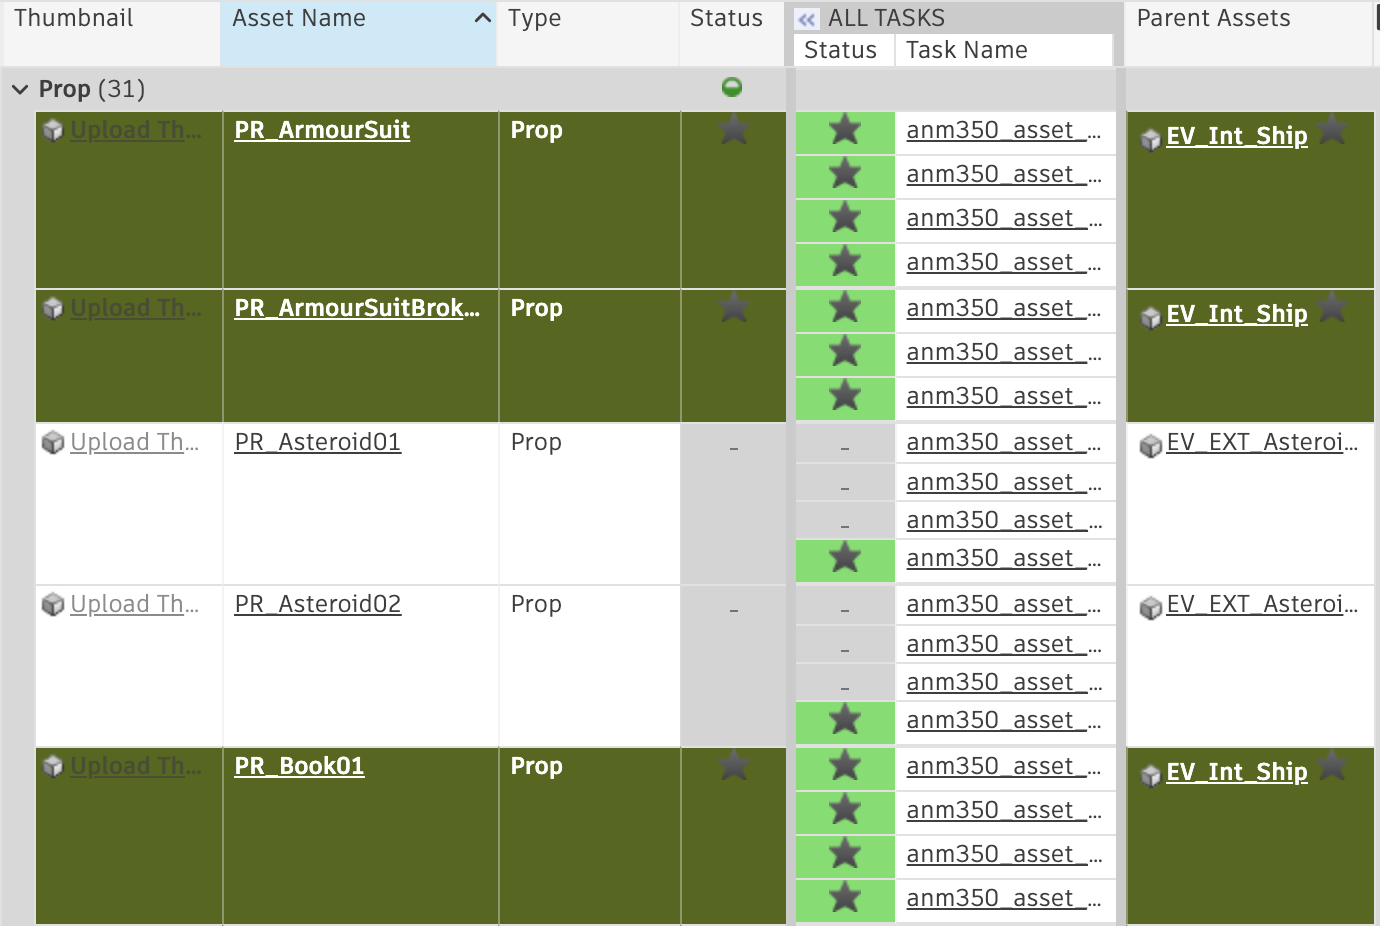
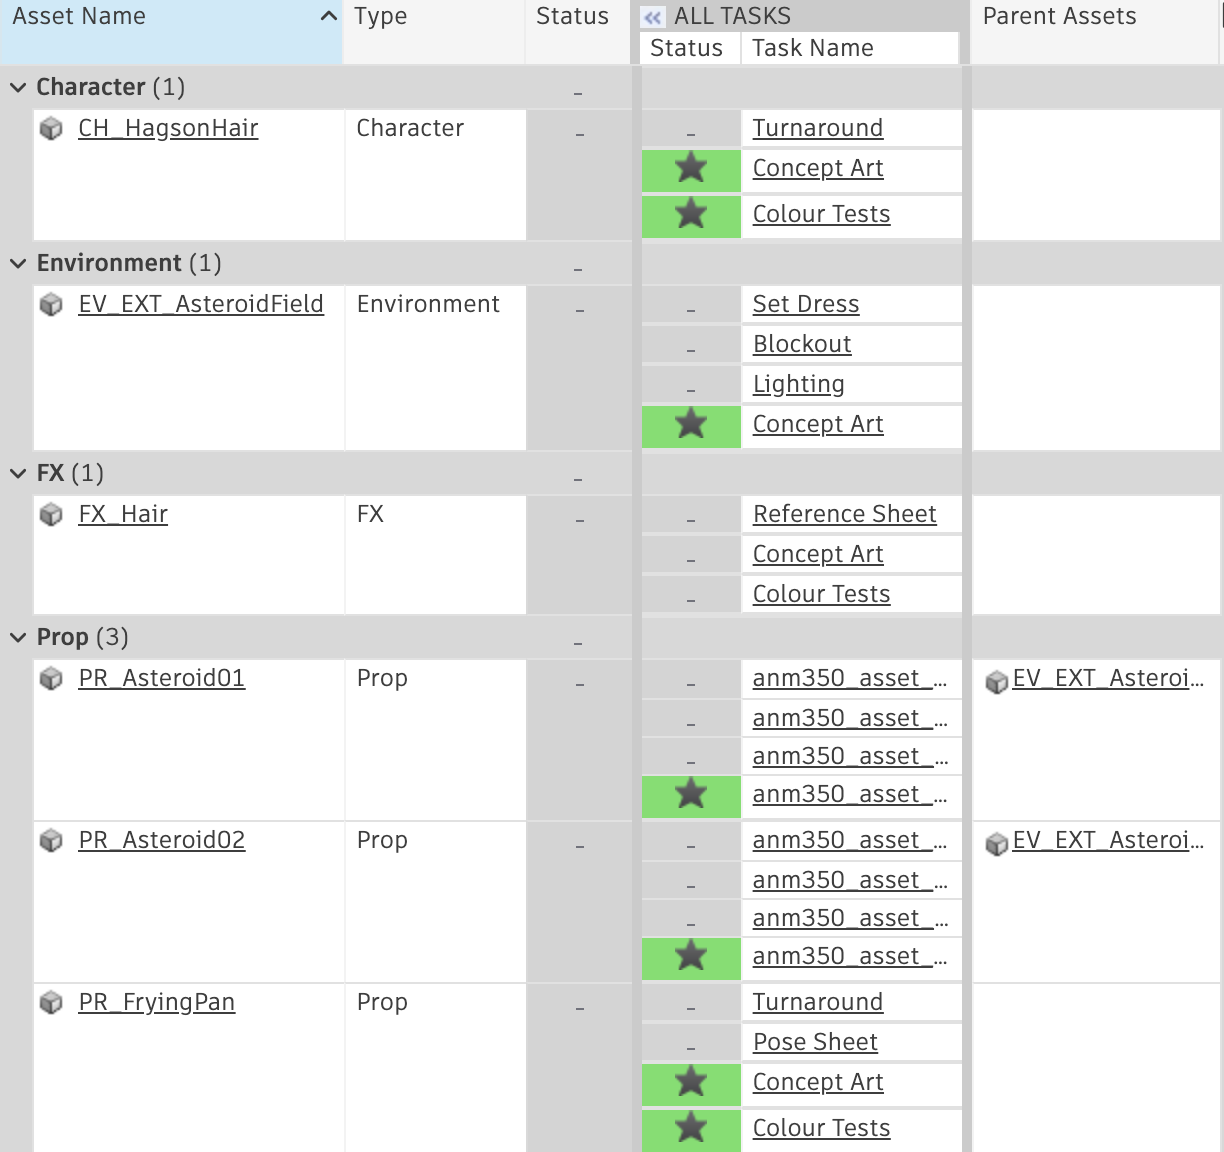
To give some context, sequence 2 is 7 seconds long, whilst sequence 3 is just under 5 seconds long. You can see below in the assets column what remained to be completed for each, with finalised assets having a star to the right of them, as well as a list of the yet-to-be-completed assets alongside the tasks attached to them:


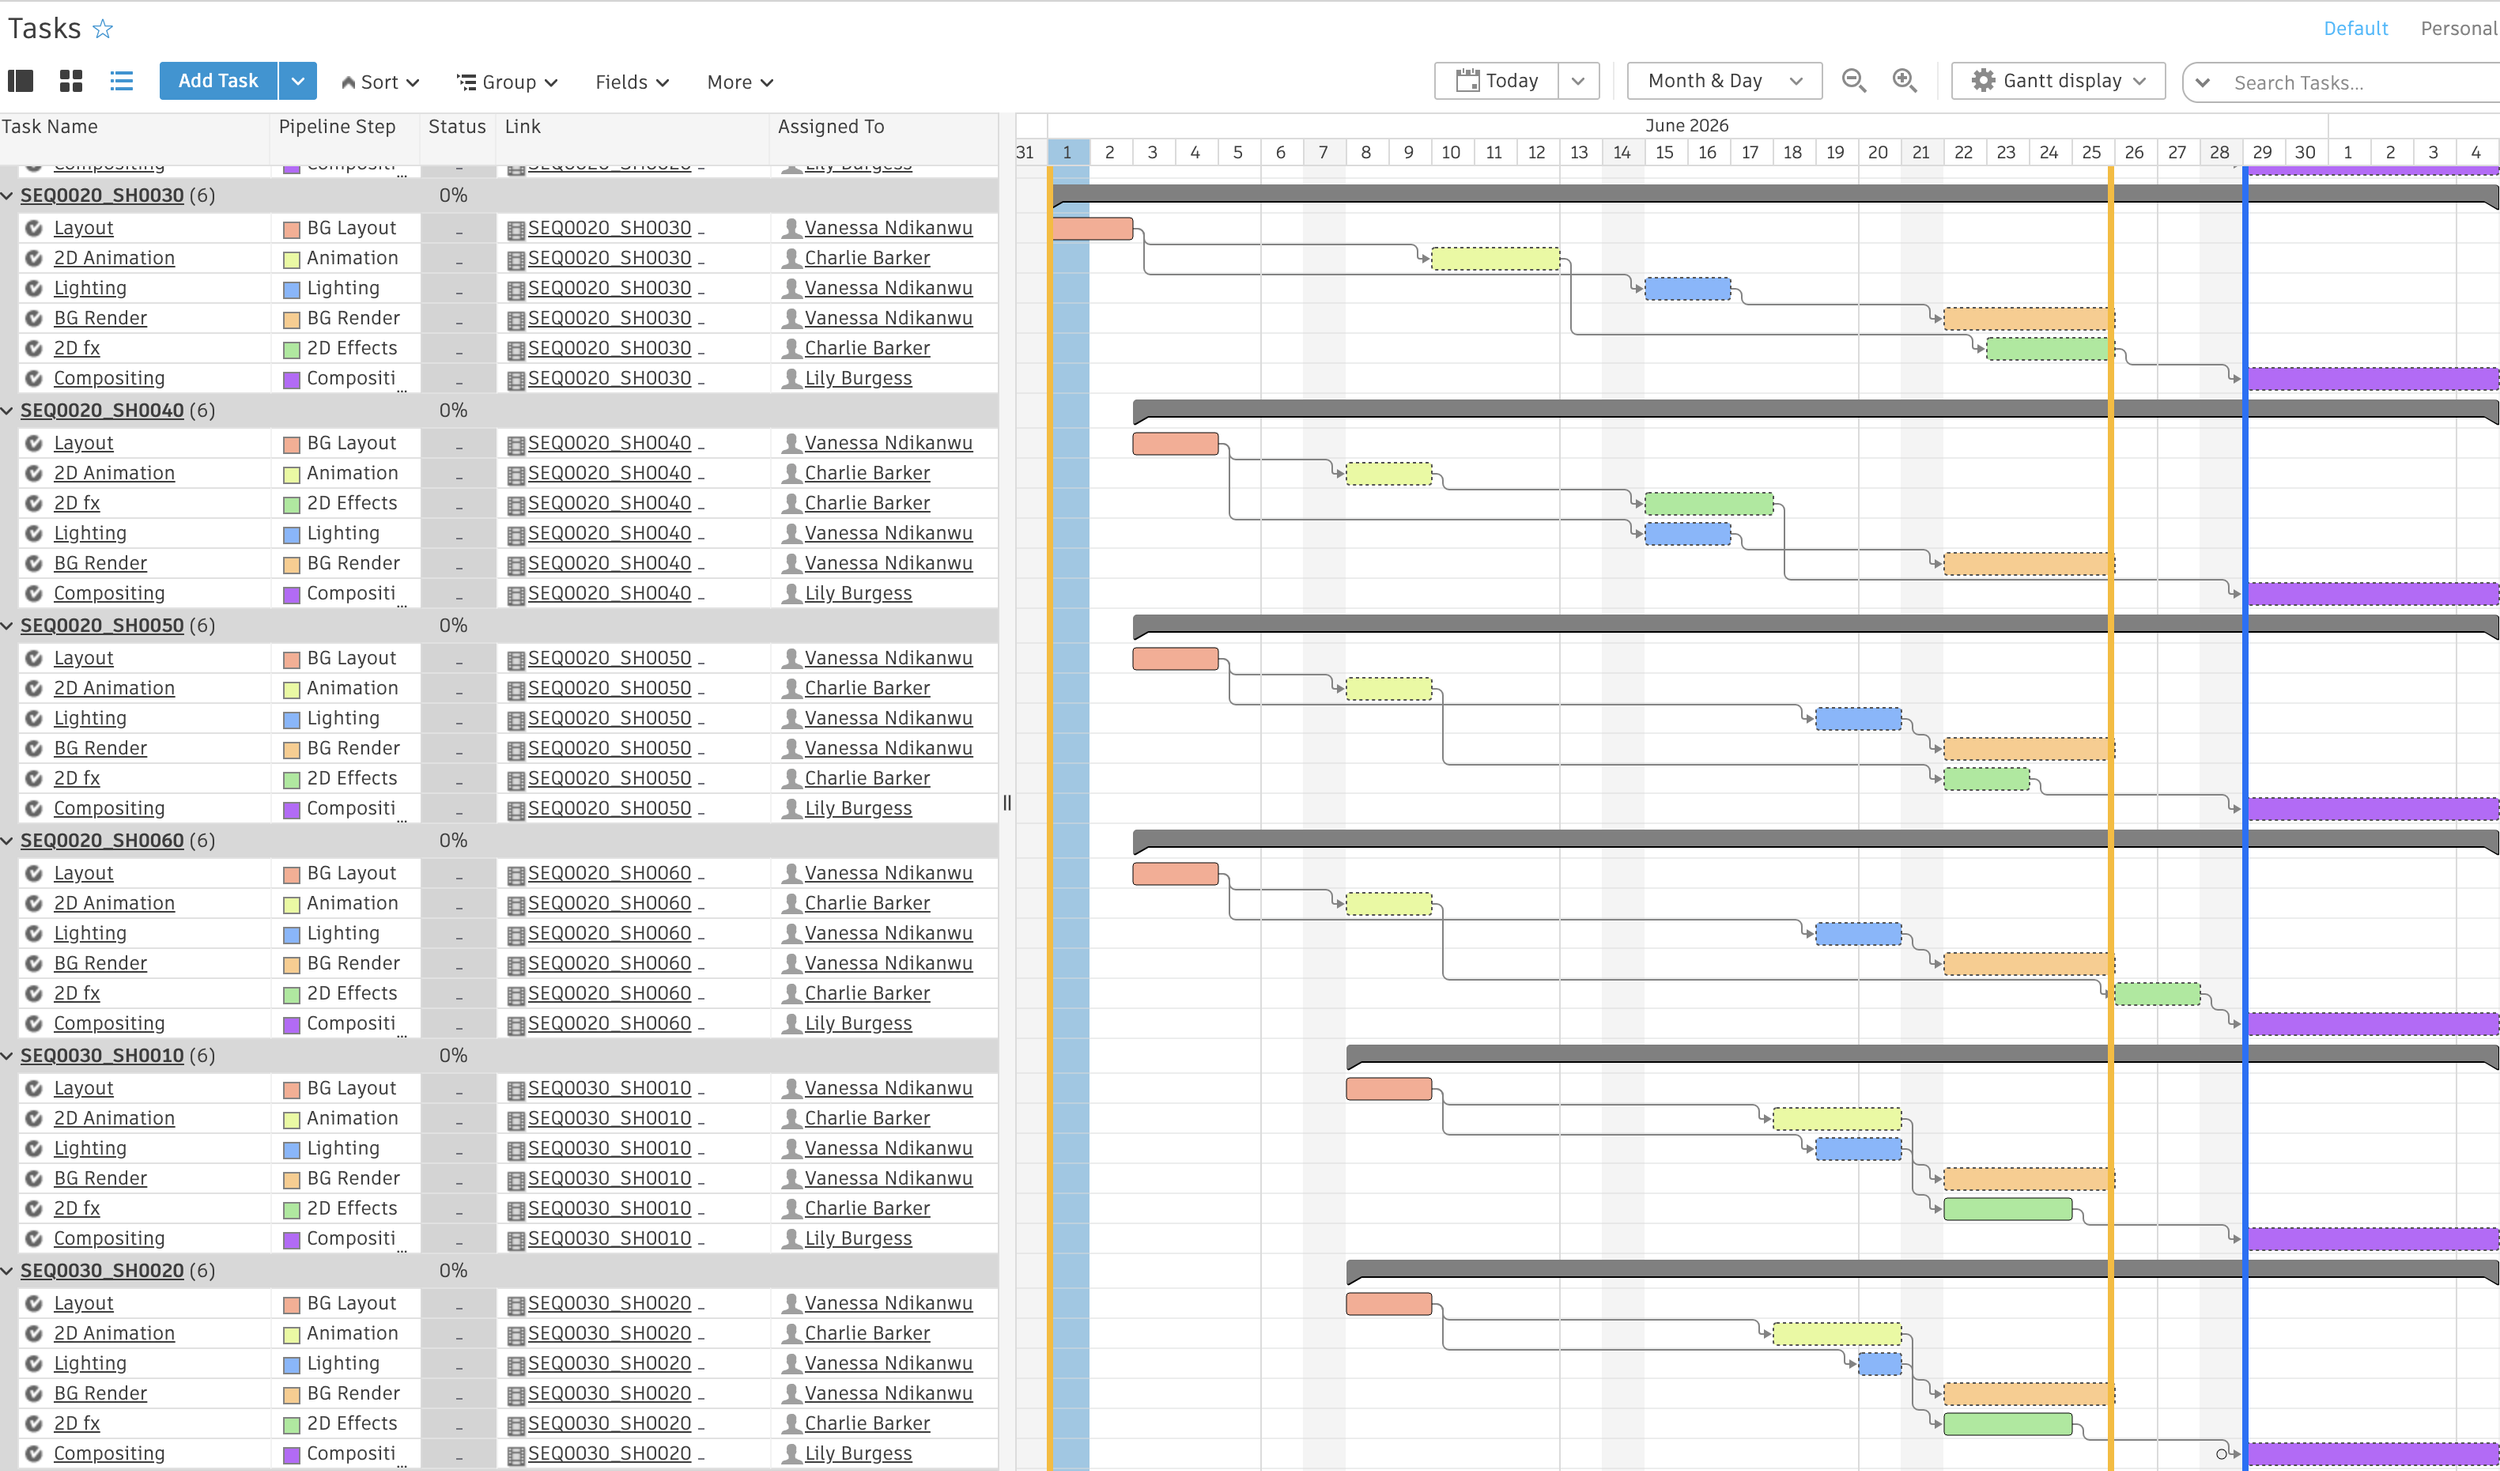
You can also see an example of the pipeline steps attached to each shot below. Naturally, each shot’s necessary assets must be completed before the majority of work can begin.

Sequence 2 Shot 2 – note the linked assets and tasks.
Something I particularly enjoyed doing for this exercise was scheduling tasks by day, rather than week. At university, I was always aware that my team was balancing their work with the requirements of other modules and often all had different timetables, and so I would most often set tasks to be done within a set week. For the Space Sweepers x Tangled trailer I did not have this limitation, and so I paid particular attention to what tasks each crew member could do on a daily basis in order to maximise productivity and minimise costs.
Before getting into scheduling, I put together a lead sheet for the unfinished sequences of the trailer. This isn’t a necessity for this project, but I had learnt about lead sheets in one of Allissoon Lockhart’s online production courses and wanted to practice putting one together. I’ve used the template shared in her course and followed her lead (no pun intended) on naming conventions.
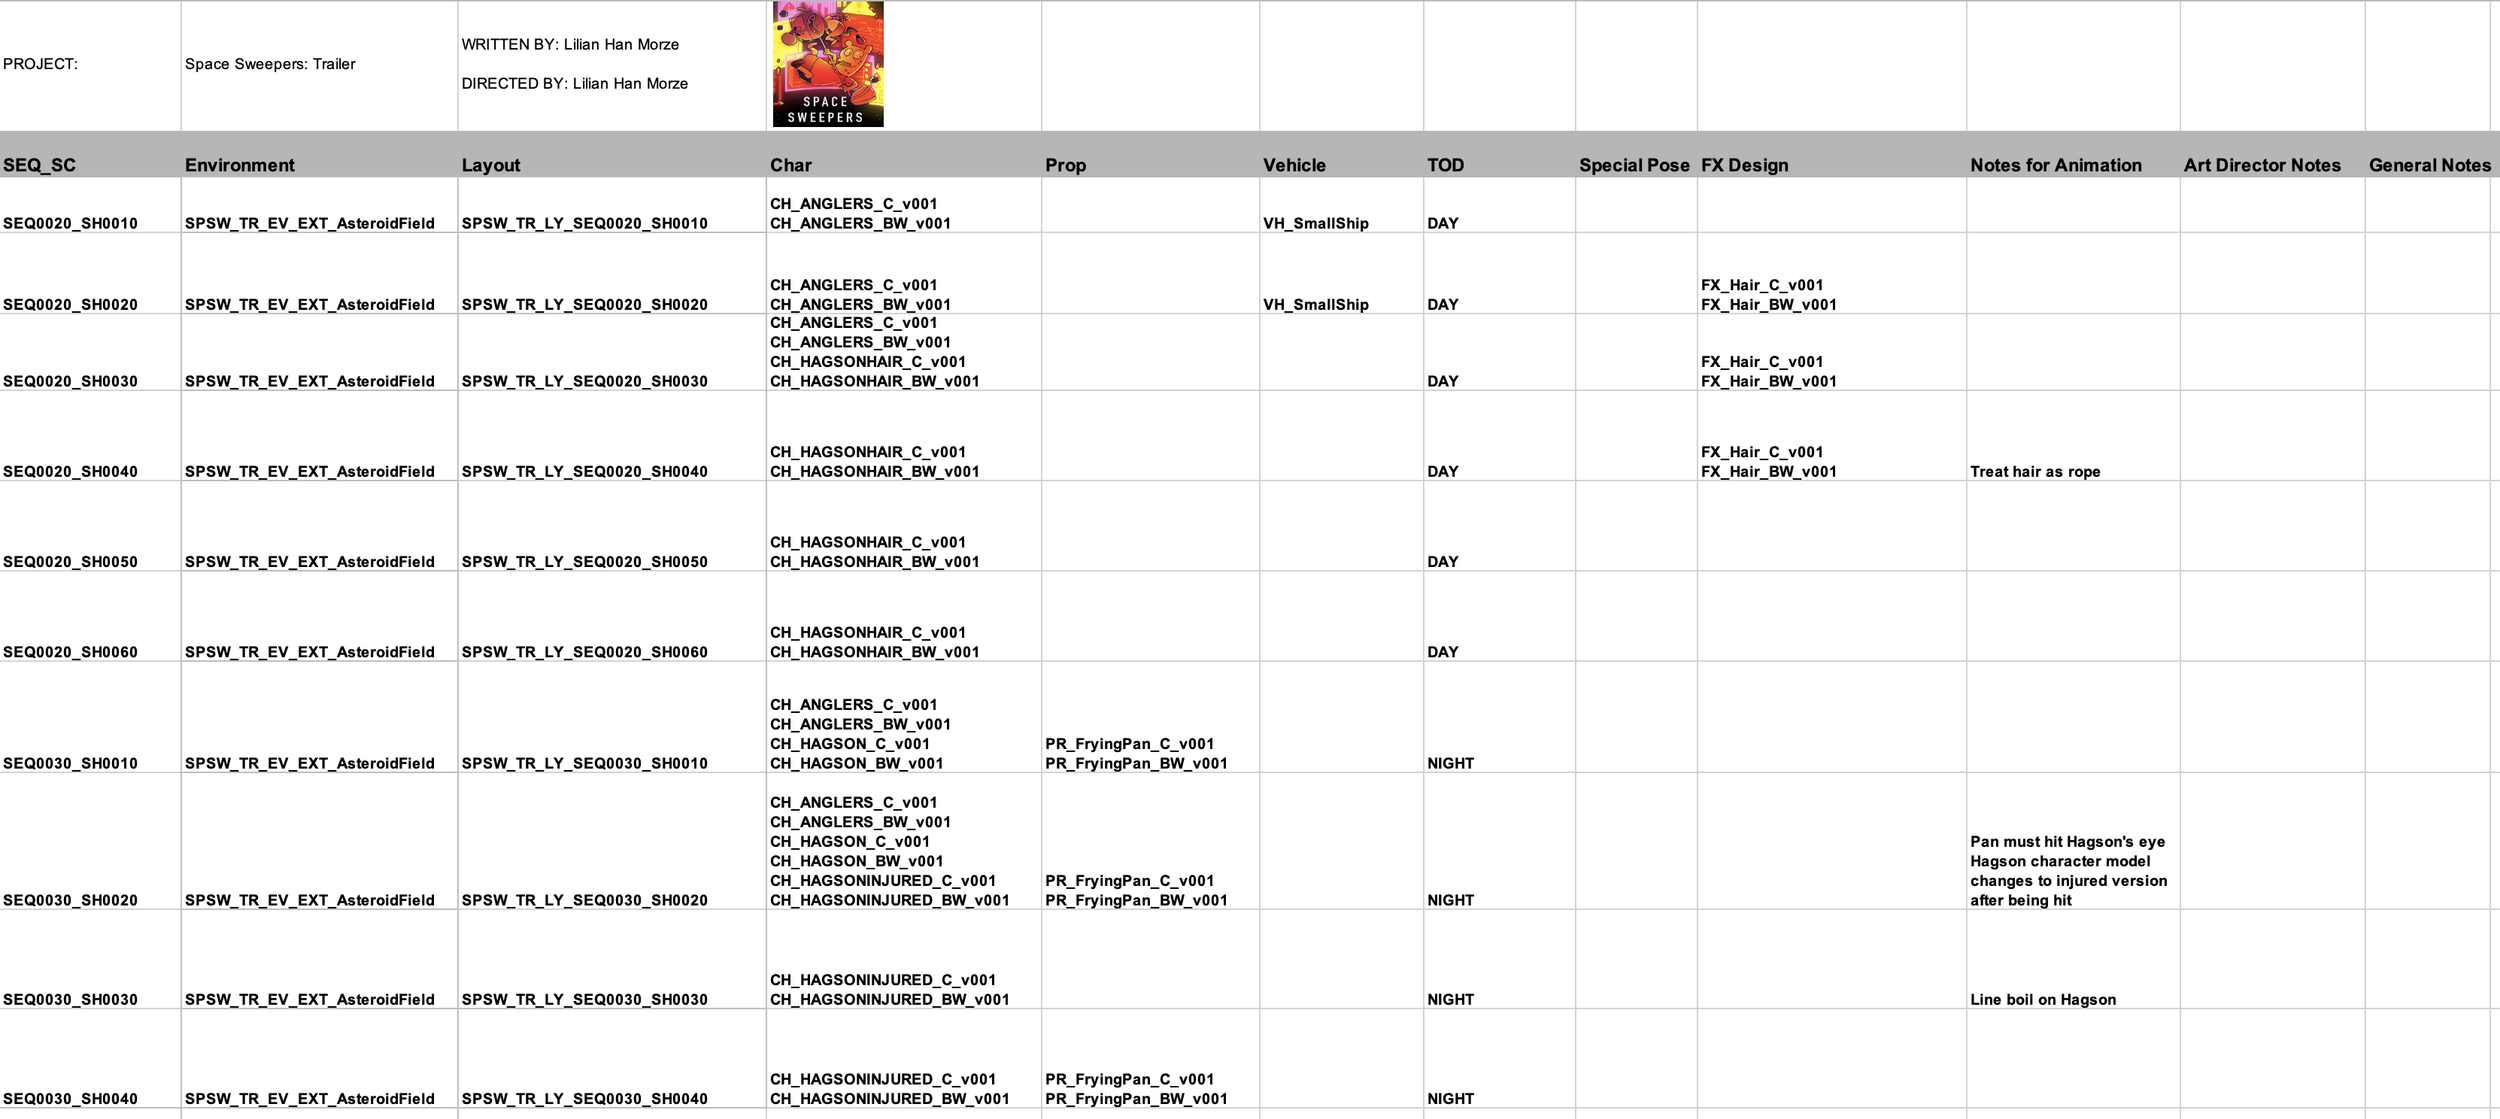
Lead sheet for the Space Sweepers x Tangled trailer.
I wanted to identify the most time-efficient way to plan out the project whilst keeping a small team. The tasks required the skillsets of a 3D generalist, 2D animator, concept artist and compositor, and initially I thought we might need multiple of these roles. However, I was conscious that my estimations of how much work somebody can get done is based on a student’s speed, and that professionals are typically work at a faster pace, so I did some investigating into what is standard in industry. My research suggested that a 2D animator typically produces 3 seconds of animation per day whilst a 3D generalist can model a simple prop in 8 hours. With this in mind, I decided we only needed one artist for each role for the purposes of the trailer.
I based estimations of the time we would need per task on the information I had found online, and then factored in at least double that time to allow for changes due to feedback – something I have previously failed to account for when scheduling. I have learnt my lesson!
So, with these things in mind, here is how I went about scheduling the project.
Scheduling Breakdown
Week 1 of 5
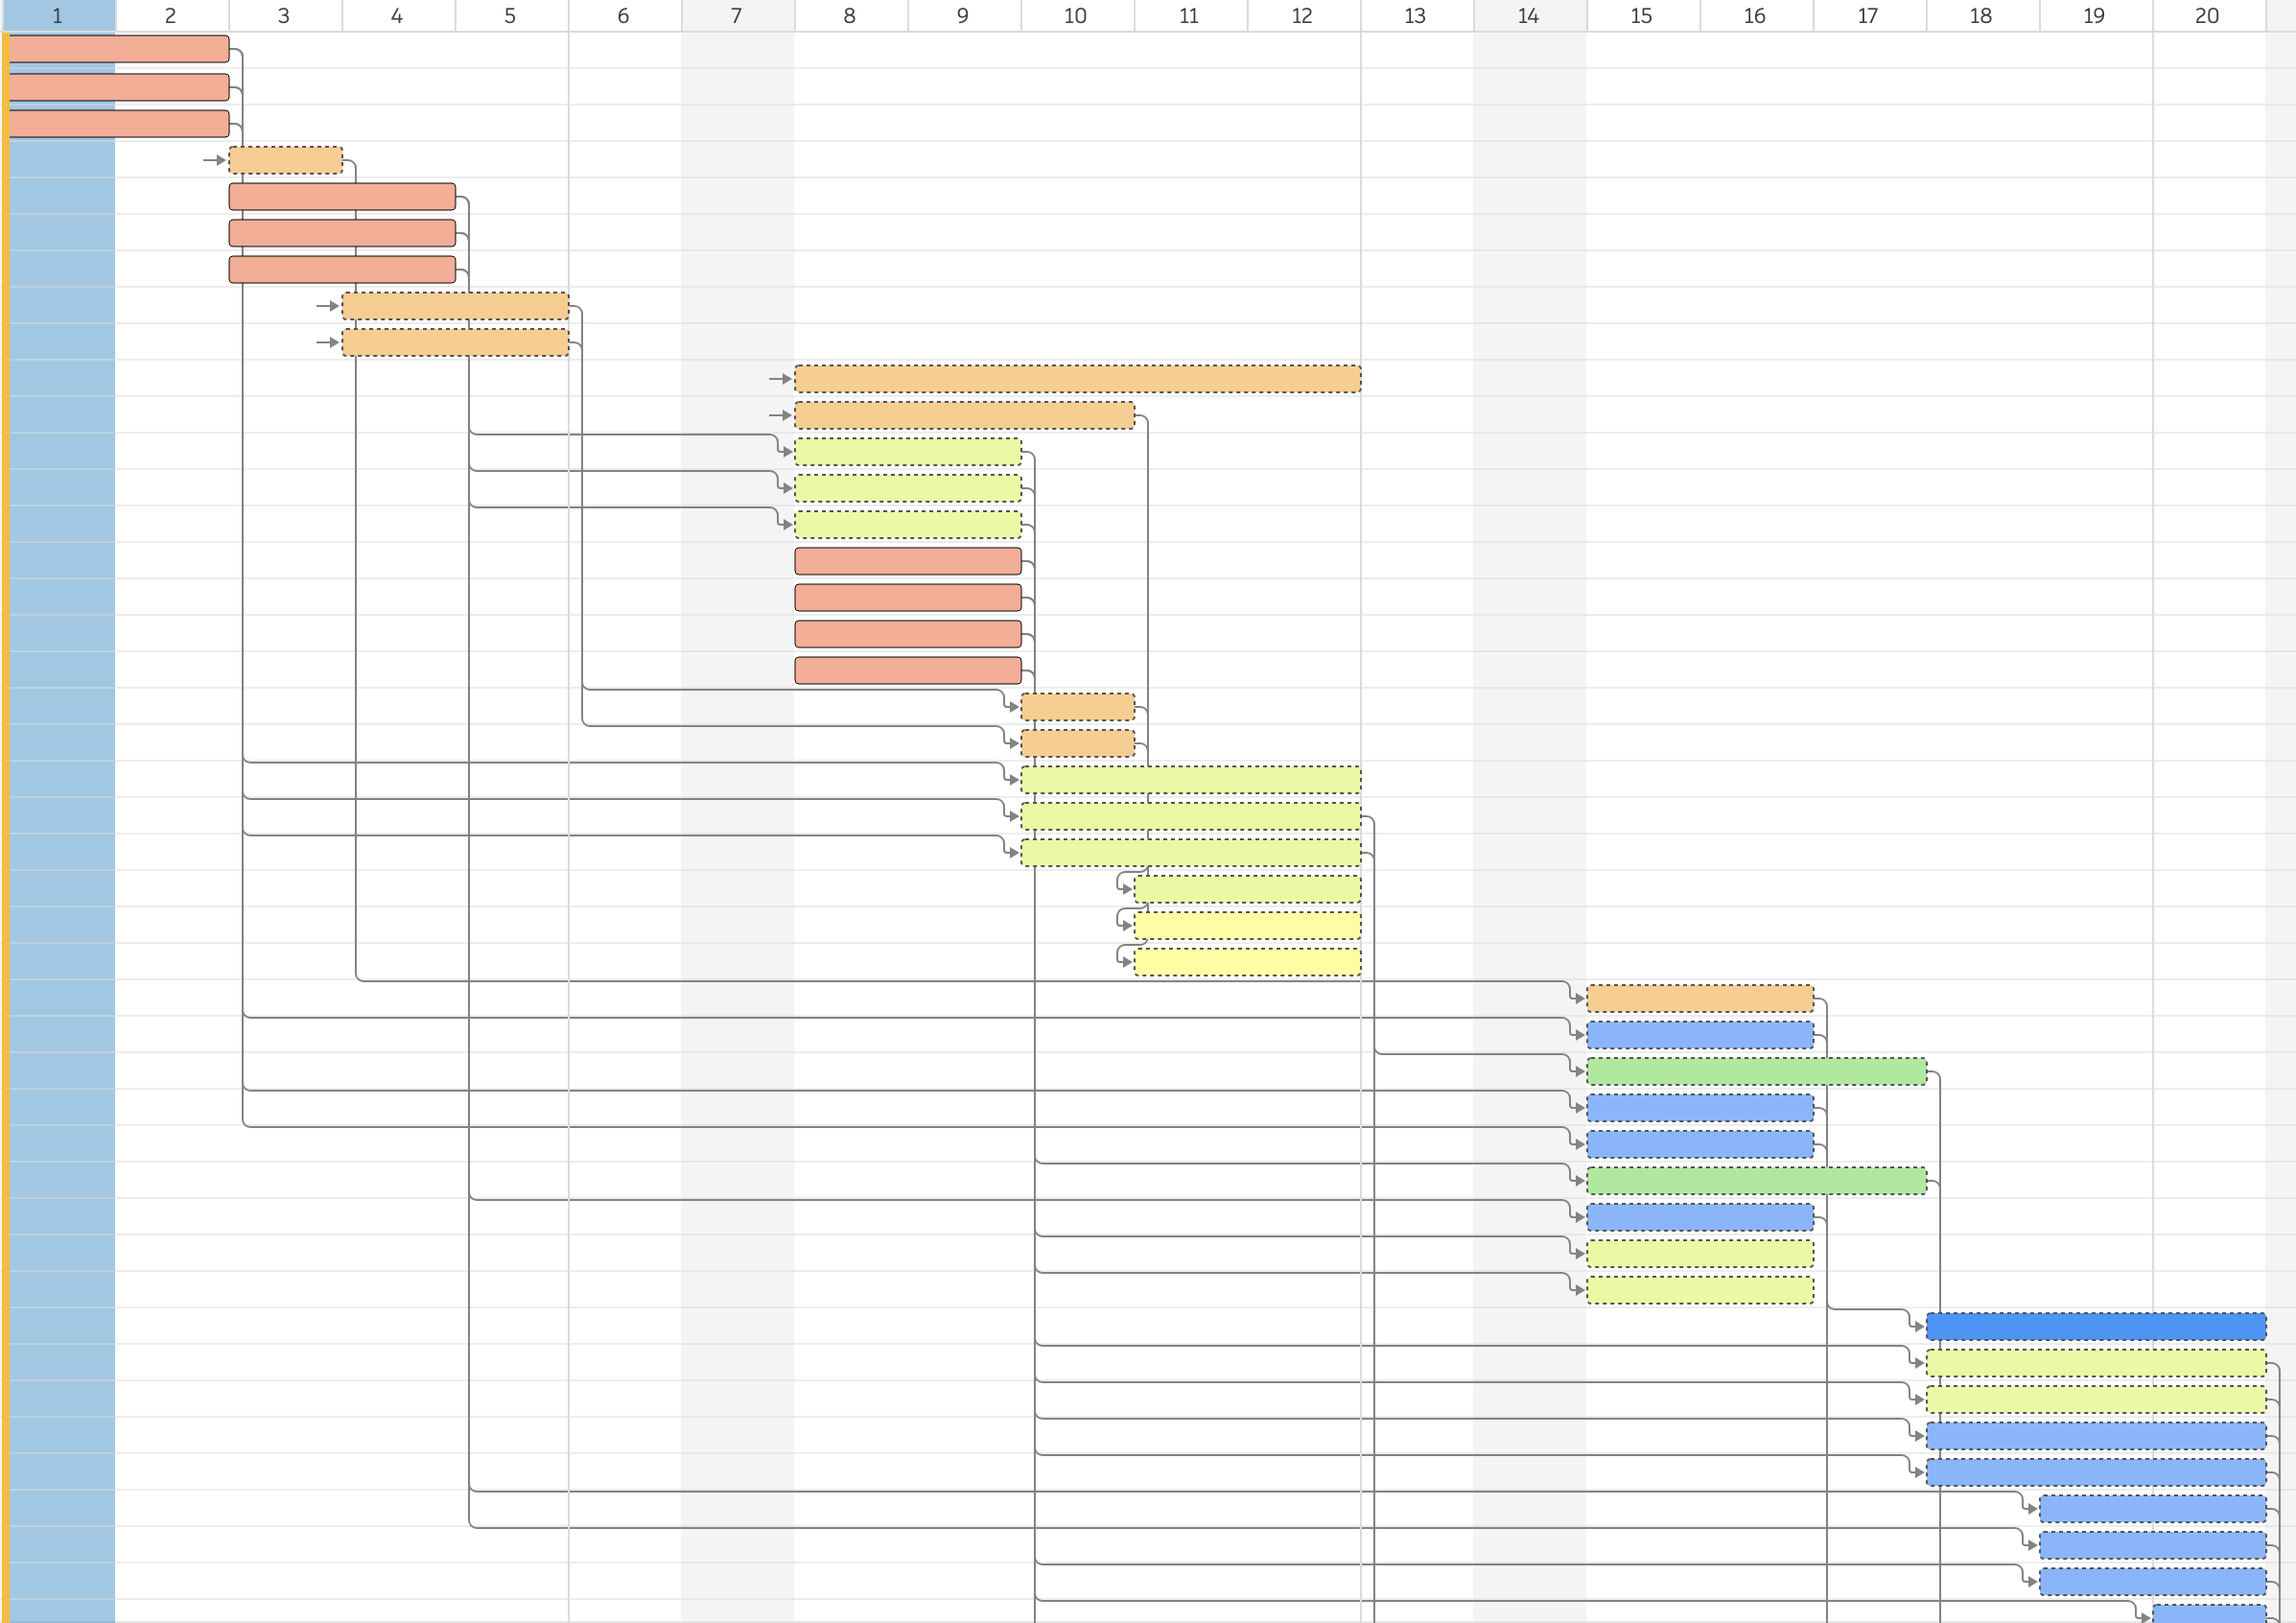
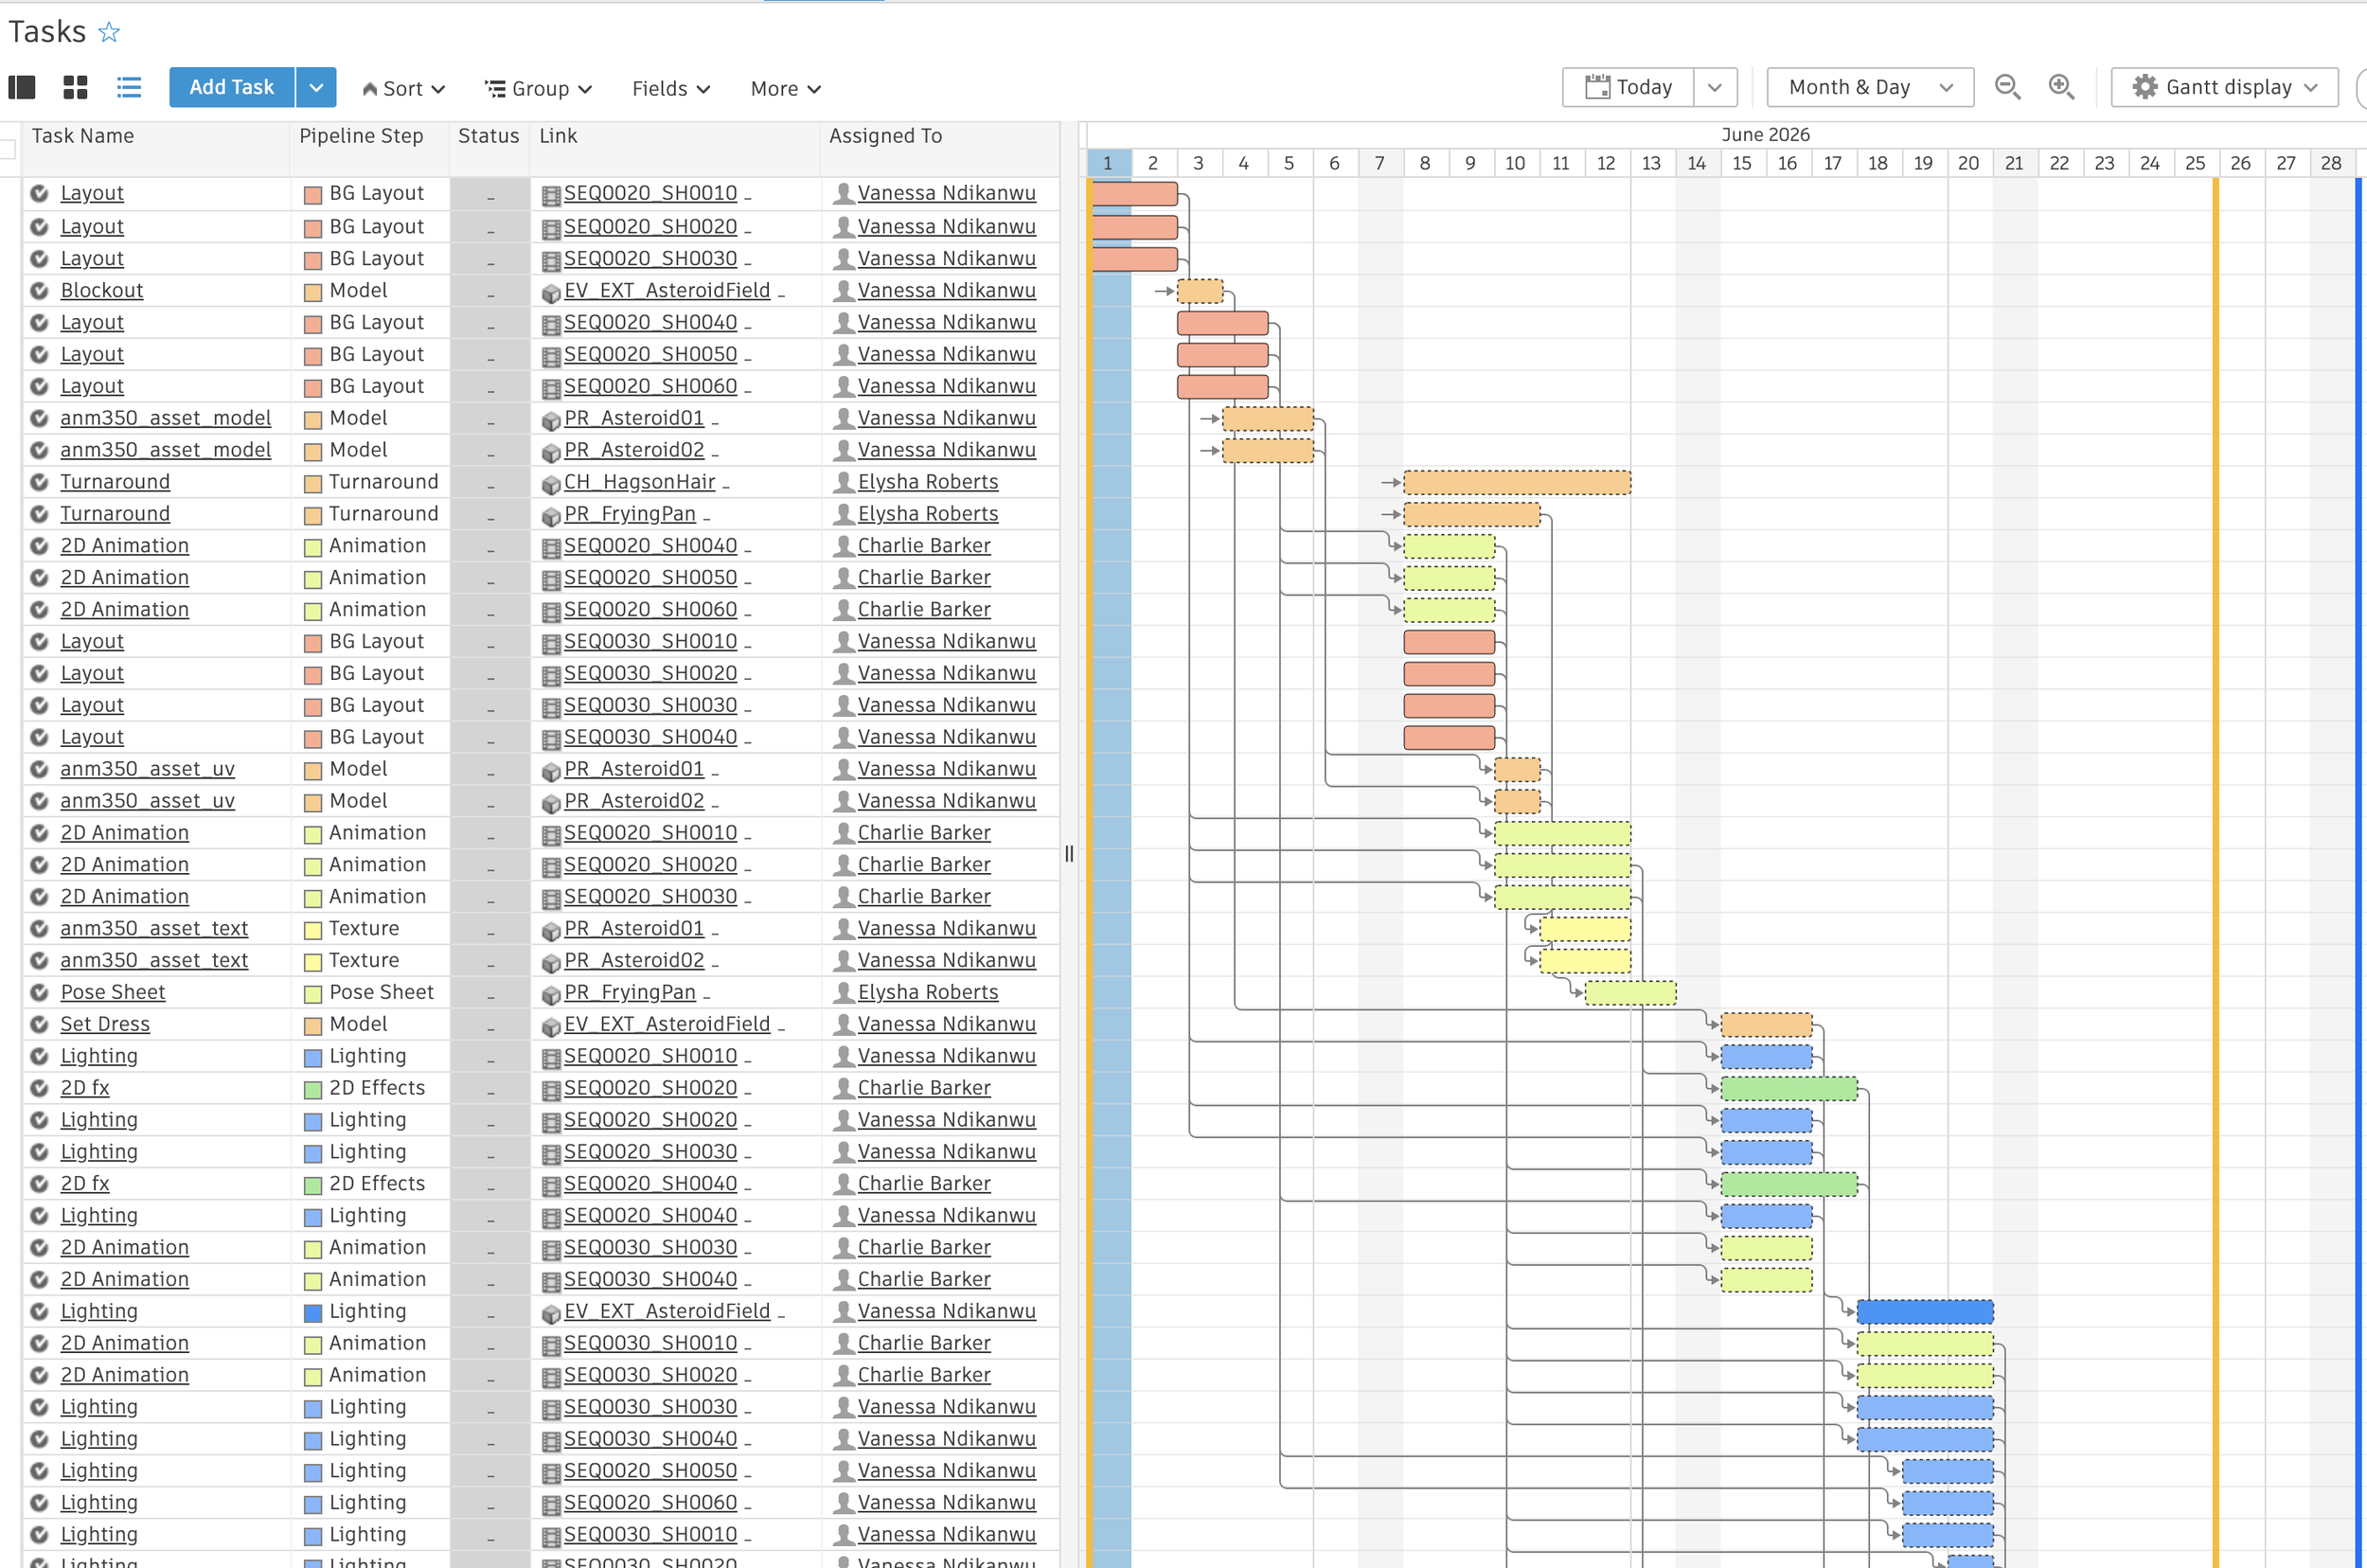
2D Pre-production: I surmised that as the majority of 2D pre-production had been completed already, we only needed one concept artist to finish it off. I planned that she would finish off the remaining two turnarounds and a pose sheet (although, looking back, I would probably rename this to ‘prop sheet’) within the first week, which would still leave plenty of time to make tweaks.

Remaining tasks for 2D pre-production, assigned to one artist to be completed within one week.
3D Production: with all pre-production completed, our 3D generalist can jump straight into production during the first week. She will first block out the asteroid field environment before going in and properly modelling Asteroid 01 and Asteroid 02. She will spend Thursday and Friday setting up cameras and exporting layouts for the six shots in sequence 1 for the 2D animator to work with next week. This may sound like a lot to do in two days, but these layouts are all simple still shots without a moving camera.
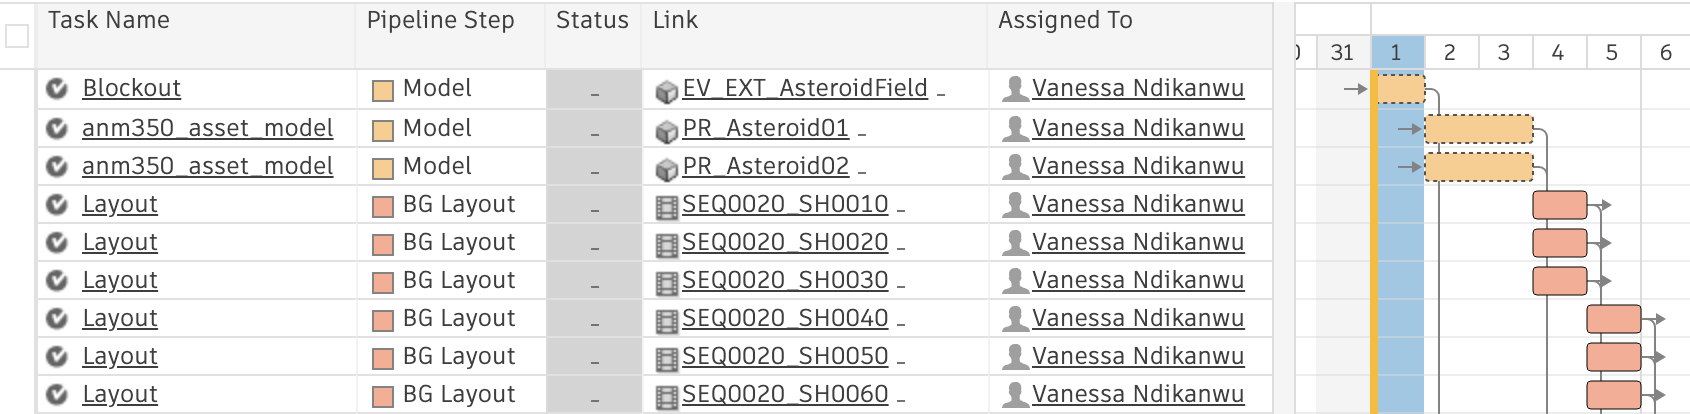
Week 1 tasks for the project’s 3D generalist.
Week 2 of 5
In week 2, we no longer have a need for a concept artist. However, we are going to bring our 2D animator on board.

2D animator’s workload for week 2.
Referencing the estimated rate of 3 seconds of finished animation each day, I have scheduled the 2D animator to animate shots four to six of sequence 2 – which total just under three seconds – during the beginning of the week, and shots one to three of sequence 2 – which total just over four seconds – in the latter half of the week. Five days to produce 7 seconds of animation should allow for ample time to revise work based on feedback.
In the meantime, the 3D generalist moves on to rendering layouts for sequence 3, and UV unwrapping and texturing the two asteroids.
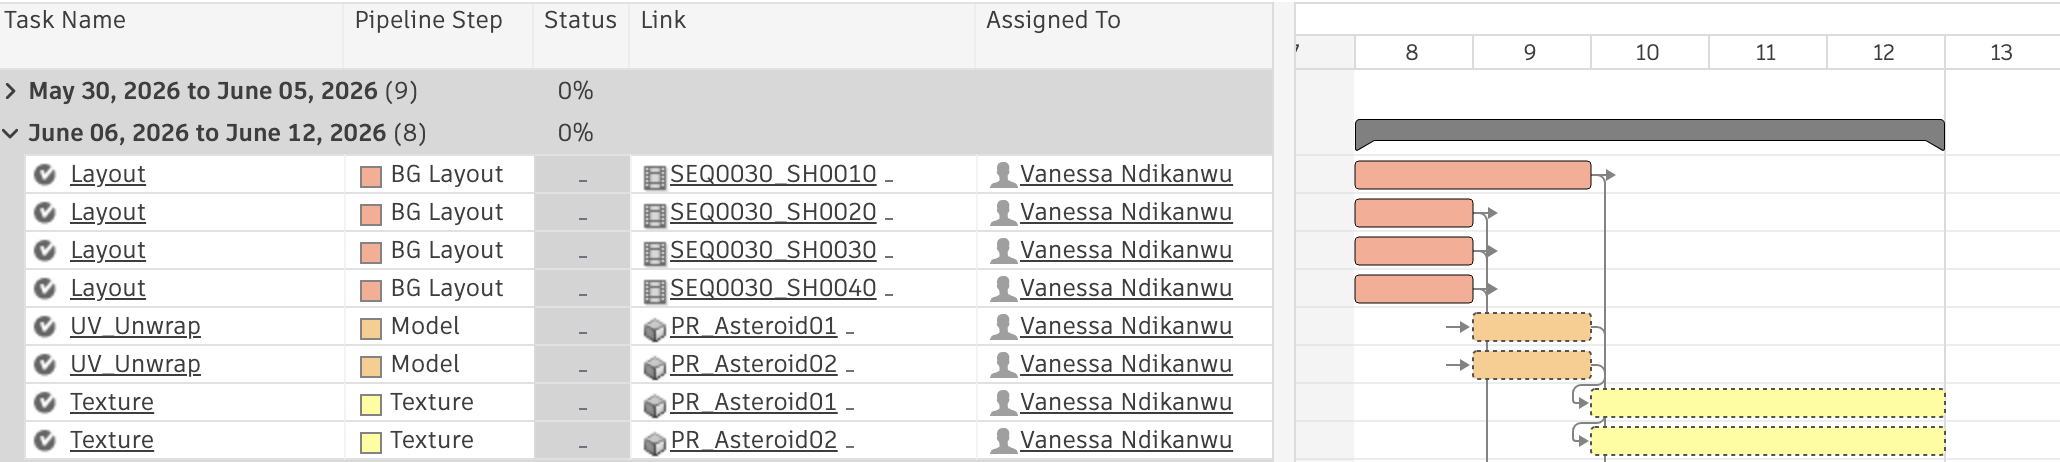
Week 2 tasks for the 3D generalist.
Week 3 of 5
In week three, both the CG generalist and 2D animator continue on.
The 2D animator animates another 5 seconds for sequence 3 before moving on to the 2D fx for sequence 2. The fx animation required for these two shots is simple, and shouldn’t pose any issue to complete. Larger productions would hire separate character animators and 2D fx animators, but this project isn’t working with a big budget!

2D animator’s tasks for week 3. I have scheduled 3 days to complete 5 seconds of animation and 2 days to complete two simple pieces of fx animation.
The 3D generalist will move on to lighting this week, tackling both sequence 2 and 3. Lighting ten shots in one week may sound like a lot for one artist, but this environment is quite literally just two asteroids and a spaceship in a void. There are no characters to light, as the characters will be animated in 2D. As such, I believe that this is more than achievable.
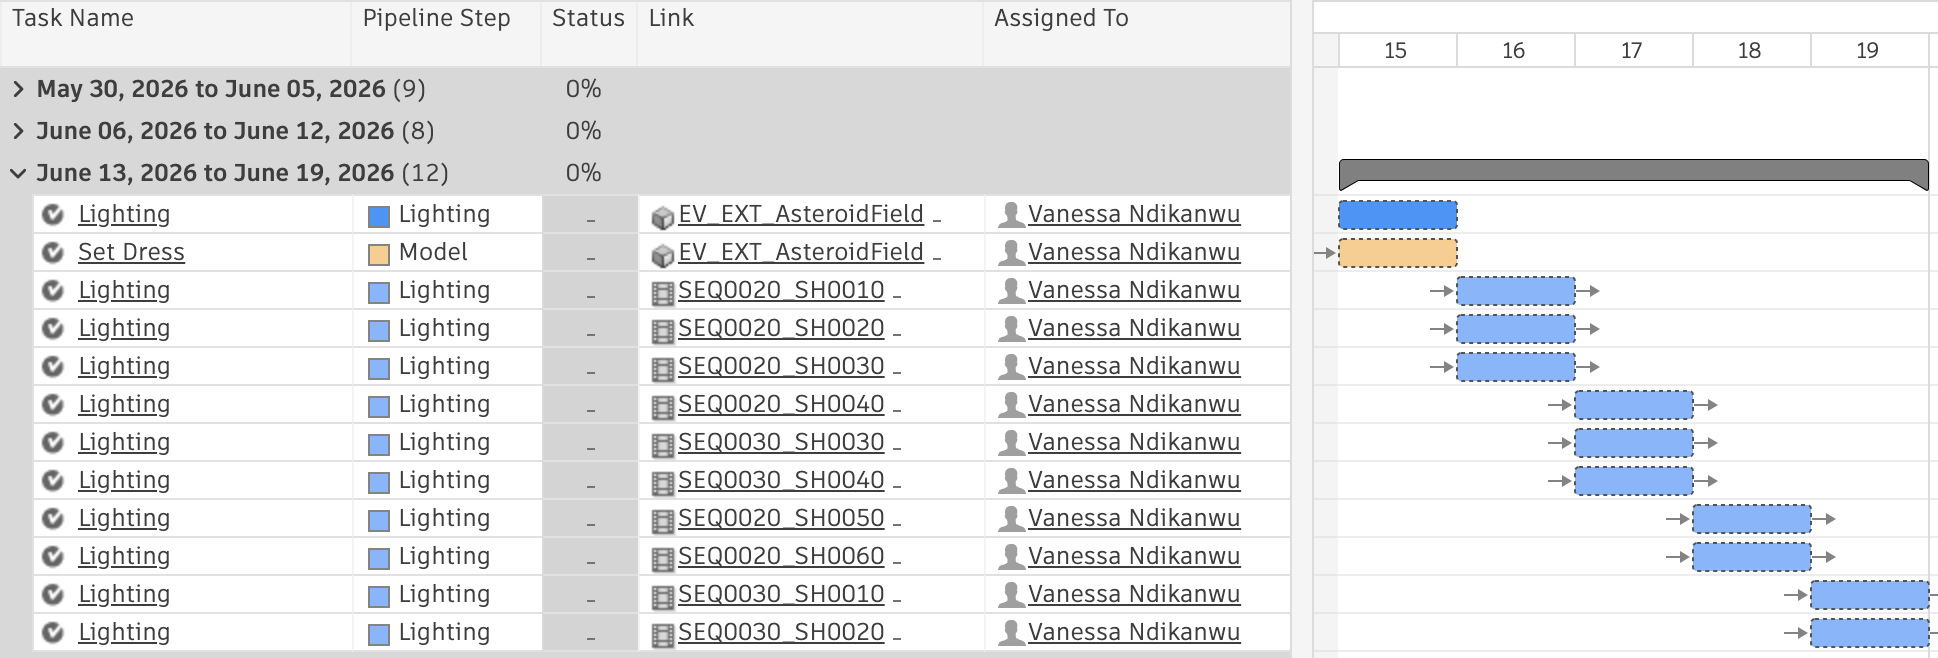
Week 3 tasks for the 3D generalist.
Week 4 of 5
Week 4 is the final week before moving into post-production, and as such is a week of ‘finishing off’. For 2D animation, that means getting through the remaining fx animation.

Final tasks for the 2D animator.
In the 3D department, it is render week. Perhaps a whole week just to render 10 very simple still backgrounds is excessive, but rendering often finds a way to go wrong when you least expect it. Much better to be safe than sorry. This week also acts as a bit of a buffer, so that if any previous tasks had overrun there would likely be time to sort them out ahead of rendering this week.
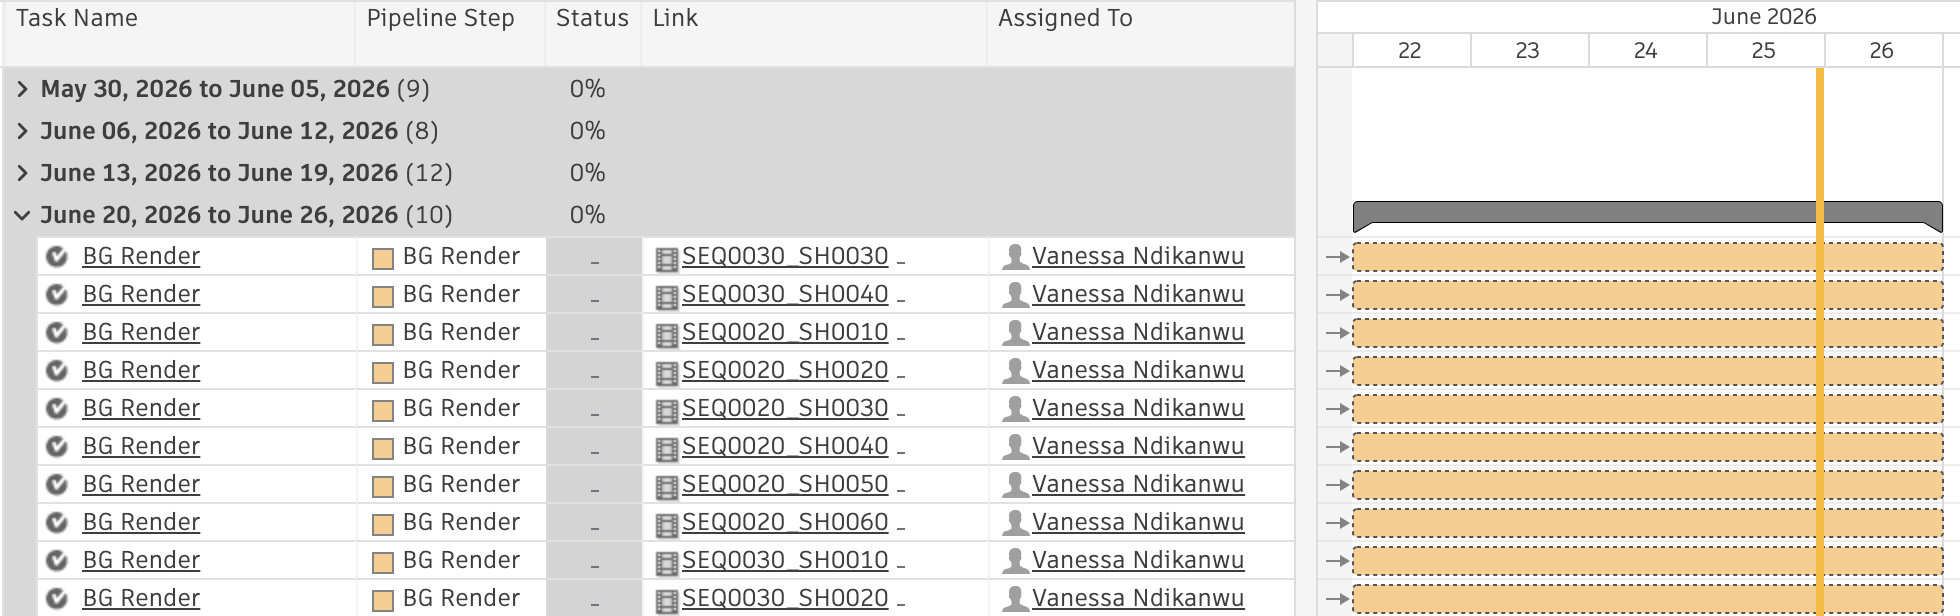
Week 4’s 3D tasks.
Week 5 of 5
The final week is post-production week, the bulk of which is taken up by compositing. I was quite happy to be able to base time estimations on my own experience for this week as the lead compositor for Space Sweepers!
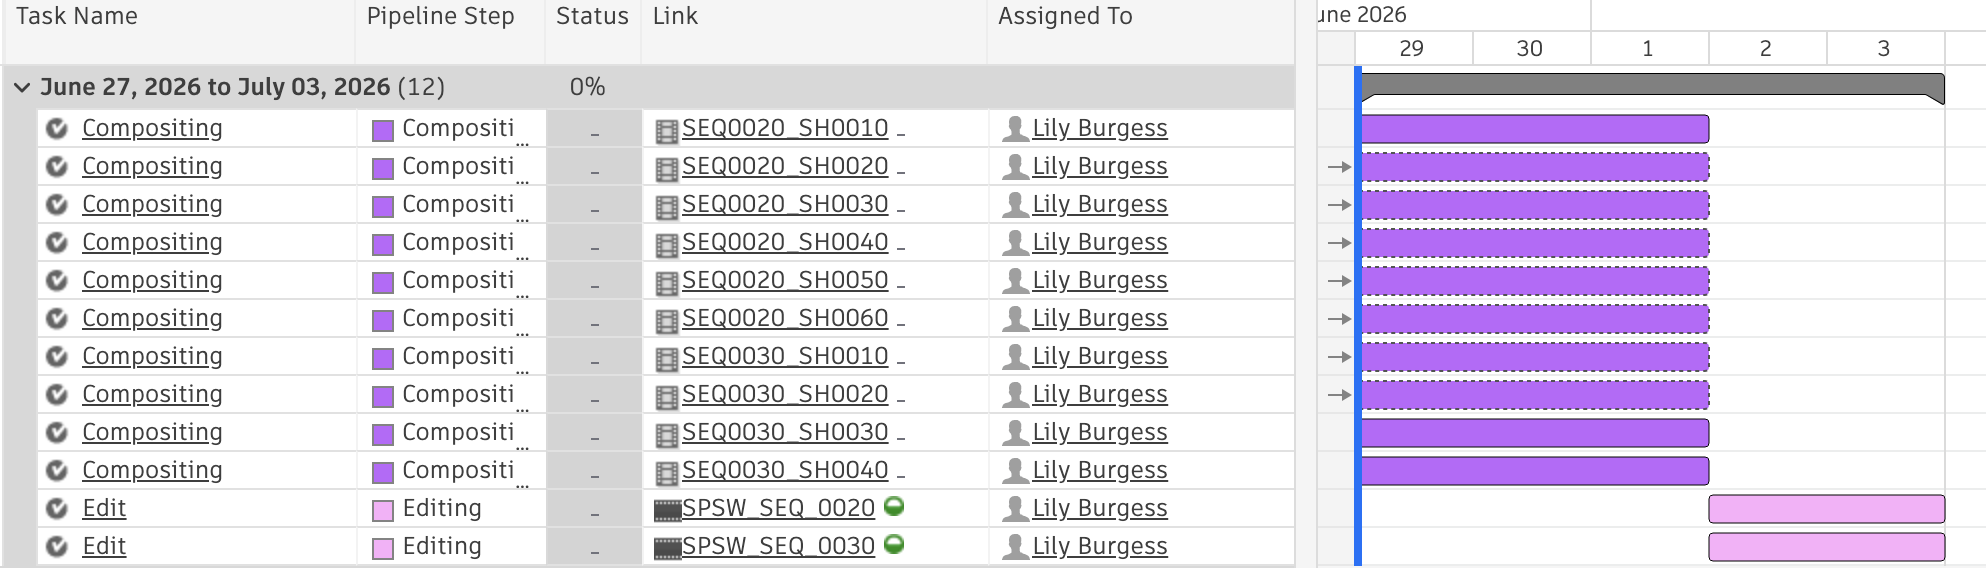
Post production week.
Space Sweepers’ style is quite quick to composite – I could get through 10 shots in a day when we were in crunch periods. I envision this schedule working out as the six Sequence 2 shots on Monday, the four Sequence 3 shots on Tuesday, and then the Wednesday is available for implementing changes as needed. Thursday and Friday are set aside for putting it all together in an edit. Would a compositor normally also be the editor? Likely not. However, again, I’m imagining this as being an indie-style project that makes sensible use of people’s varied skillsets.
There is also the matter of sound, which I haven’t included above. A sound designer would have to be hired to work on the trailer, which they would be able to start doing from week 1 as the animatic was already picture locked. Whilst sound isn’t included in the above schedules, I have factored a sound designer into the budget which you will find below.
Budgeting
To finish off this learning exercise, I drew up a budget for the trailer based on union rates and average estimates, as well as factoring in 30 days of Instagram adverts. I have since adjusted the rate of pay for artists, as although union rates are listed as £155 per day, I was advised by a lecturer the £250 was more accurate.
I don’t pretend to be an expert at budgeting, and it is certainly an area I have much to learn about. However, I am happy to have dipped my toes in it for this hypothetical project.
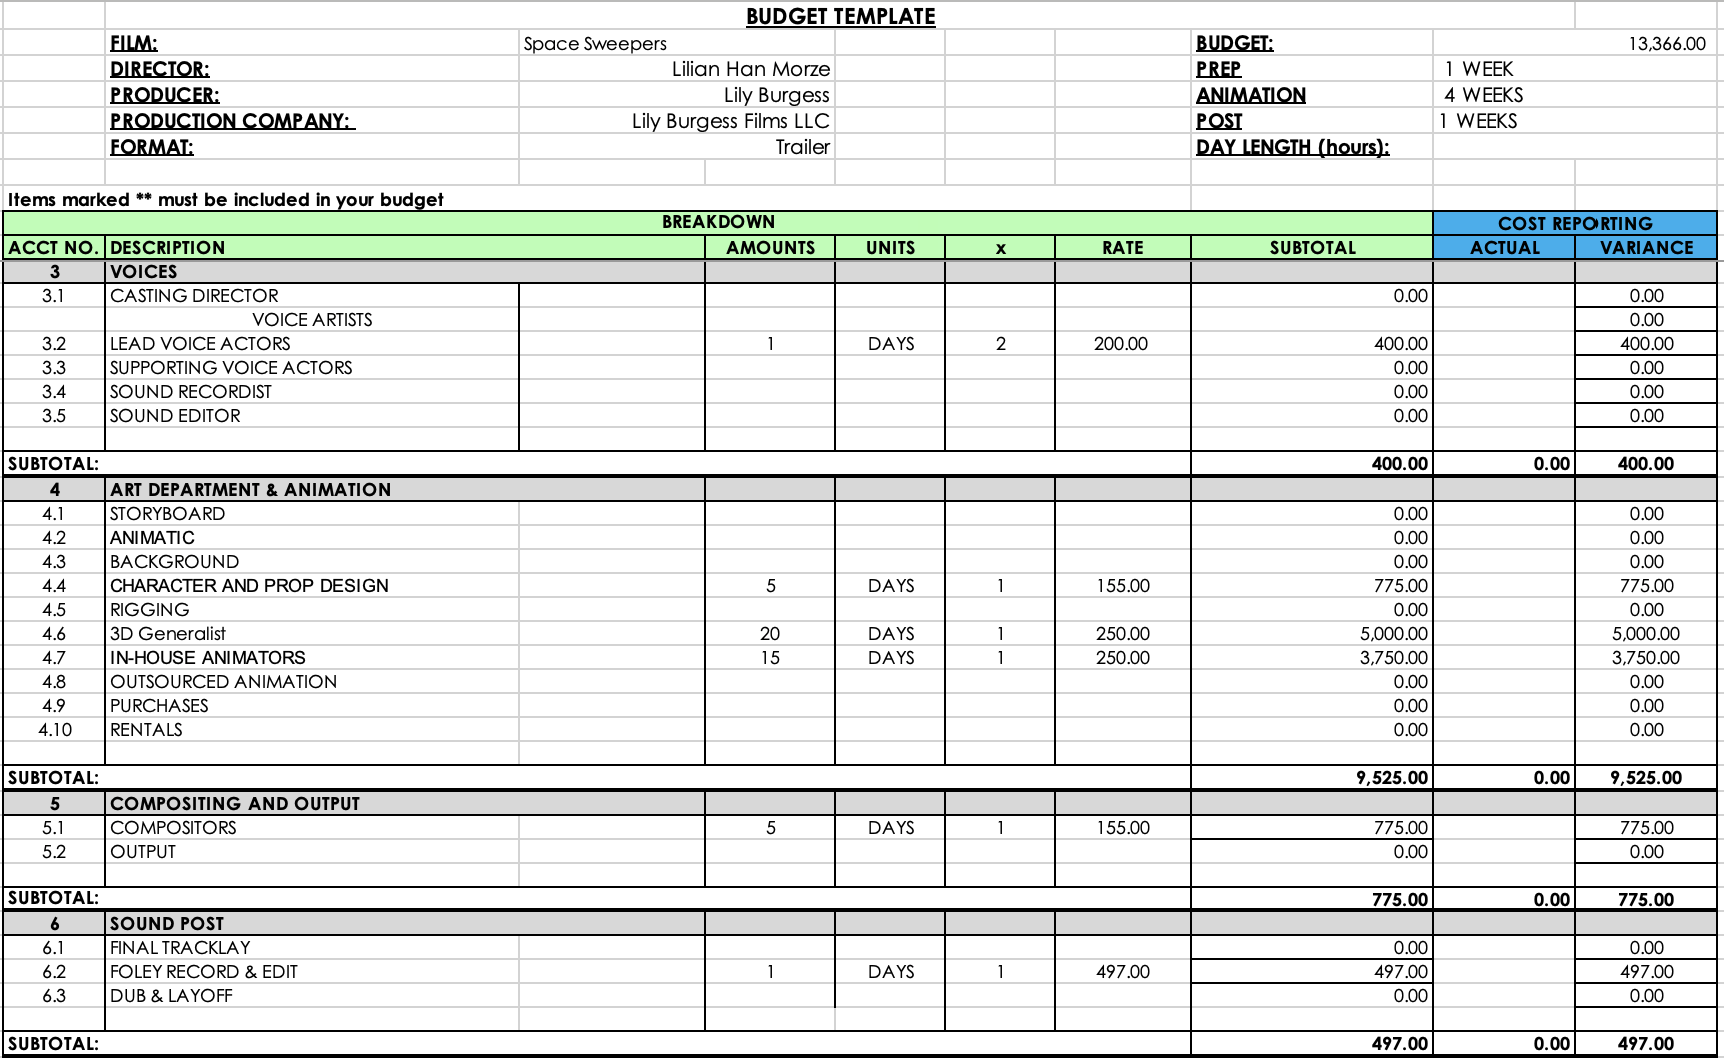
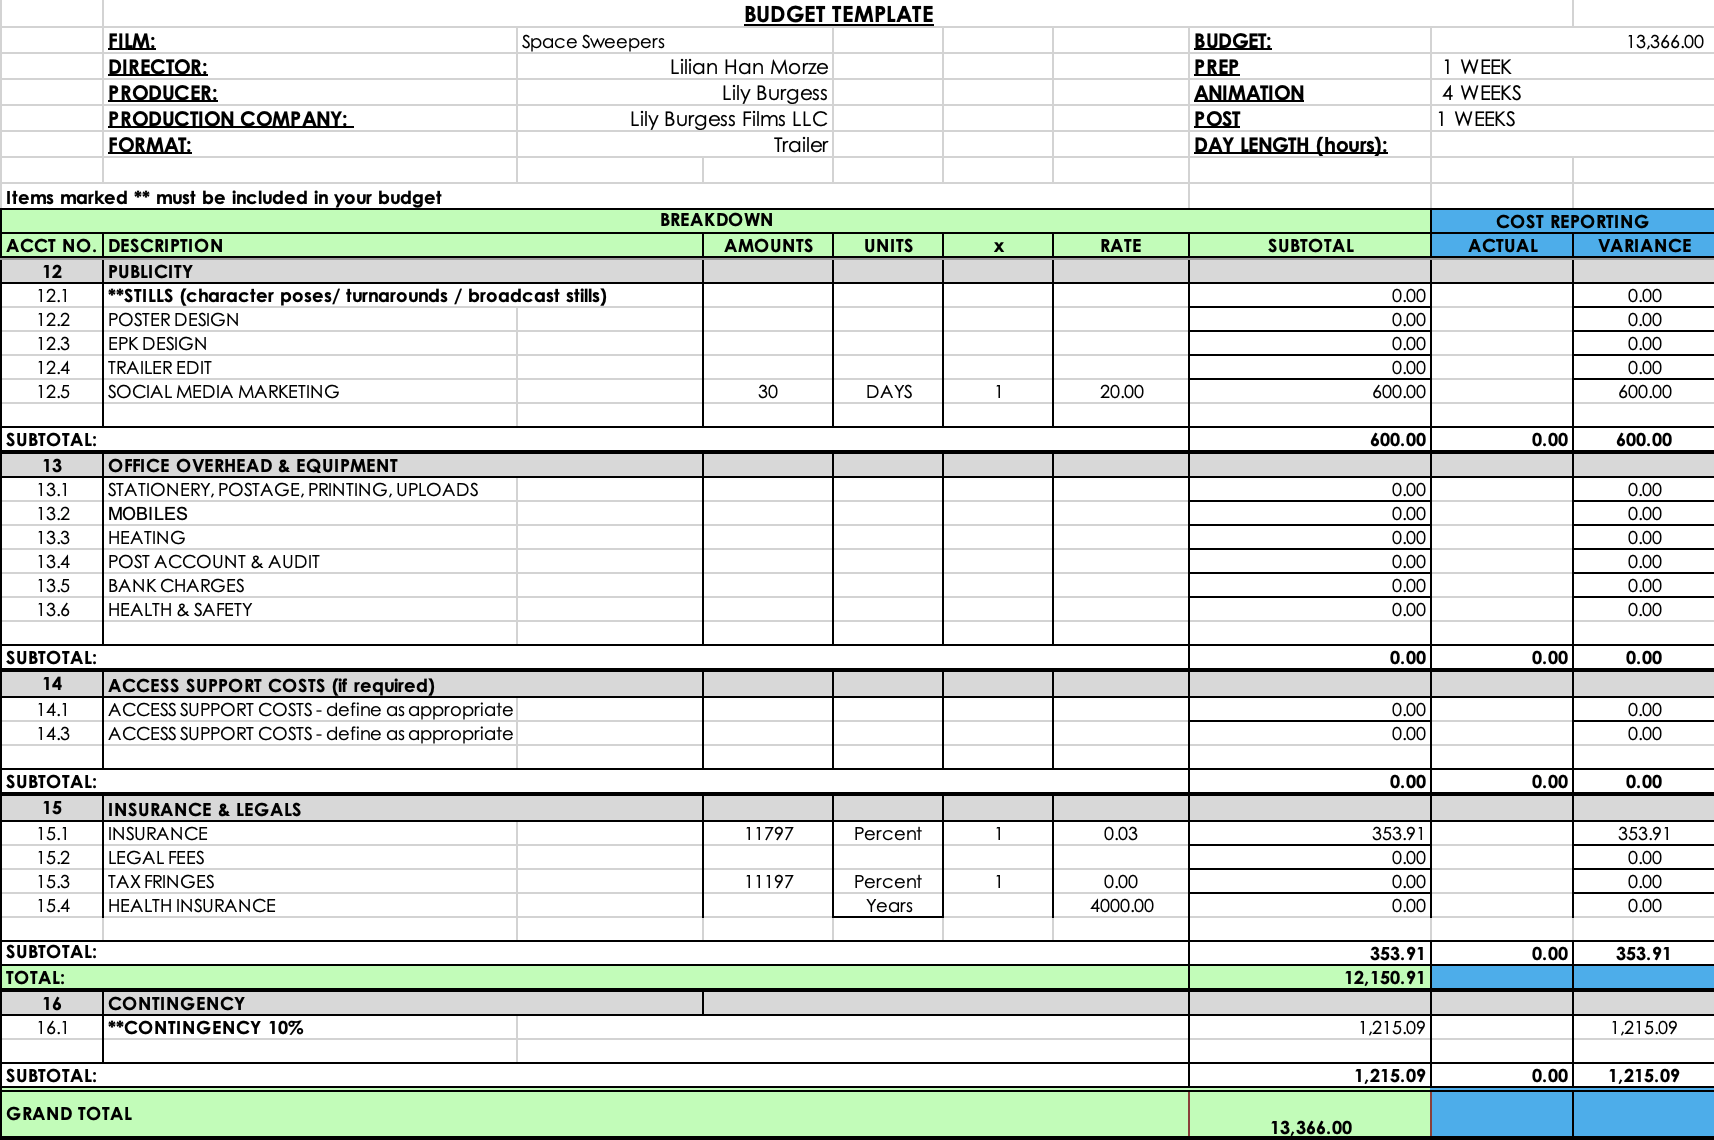
I have a newfound respect for the art of budgeting on big productions – I can’t imagine the difficulties of costing up not only artist rates, but studio space, electricity, software, other staff members such as technical support and HR. Whilst I am sure I would enjoy the problem-solving of it all, I can’t say it’s something I would feel confident doing just yet!
Final Thoughts
Of course, this blog just scratches the surface of all the thought that went into planning this imaginary project. I thoroughly enjoyed the exercise, feeling able to put everything I had learnt about Flow to good use. It is a beast of a software, and I still have a lot to learn, but I can confidently say that now, at the very least, I understand the fundamentals.
If any other Flow newbies come across this post, I would highly recommend putting yourself through a similar project to really test what you know, what you don’t, and begin to fill in those gaps in your knowledge.