Tackling the challenge of fitting multiple projects into one Flow project.
Flow, Shotgrid, Shotgun… whatever you want to call it, Autodesk’s tracking software holds a monopoly over the industry. I knew I wanted to learn to use it before I graduated from university, even if that meant having to encourage a whole team of artists to use it too – for Flow is really designed for both producer and artist alike. For my final year specialisation module, then, I am focusing on acquainting myself with the software.
How I ended up with eleven projects to produce at once
Of course, you can only gain so much hands-on experience with production software without, well, having something to produce! But this module was an individual one, allowing each student to work on an individual project of their own choice.
What, then, would I produce?
After much discussion, the final decision came to be that I would produce other students’ personal projects for the module: eleven of them, to be exact, as that is how many people volunteered to be produced. These students were planning to work on a large variety of specialisms, from character design to 3D layouts, to rigging, to fx animation… even to mixed media music videos.
Although I was initially hesitant about the benefits of this, as it is quite obviously different to producing a whole team, these worries were soothed after I spoke to a few producers in industry. They advised that it is not at all uncommon to produce very small teams, so in fact, it would be quite valuable practice to work very closely with people alongside the larger crews I am already producing for final year films. So, that is what I set out to do!
I reached out to a Flow specialist on LinkedIn asking for some advice on the best way to approach this. Should I make a separate project for each person? Organise it all by departments? This would be my first time properly using Flow, and so I wasn’t sure where to start! He suggested that I only create one project and that I assign each student a sequence. This sequence would be the ‘hub’ of their personal project.
A walkthrough of my set-up
After much figuring out, I believe I have now set the project up in such a way that is not only organised, but is easy to navigate for the artists – something that was important to me, as I knew that in order to get the most out of this experience I would need to get all my artists using Flow, which the majority of them had never done before.
Without further ado, here is how I have it set up:
Sequences

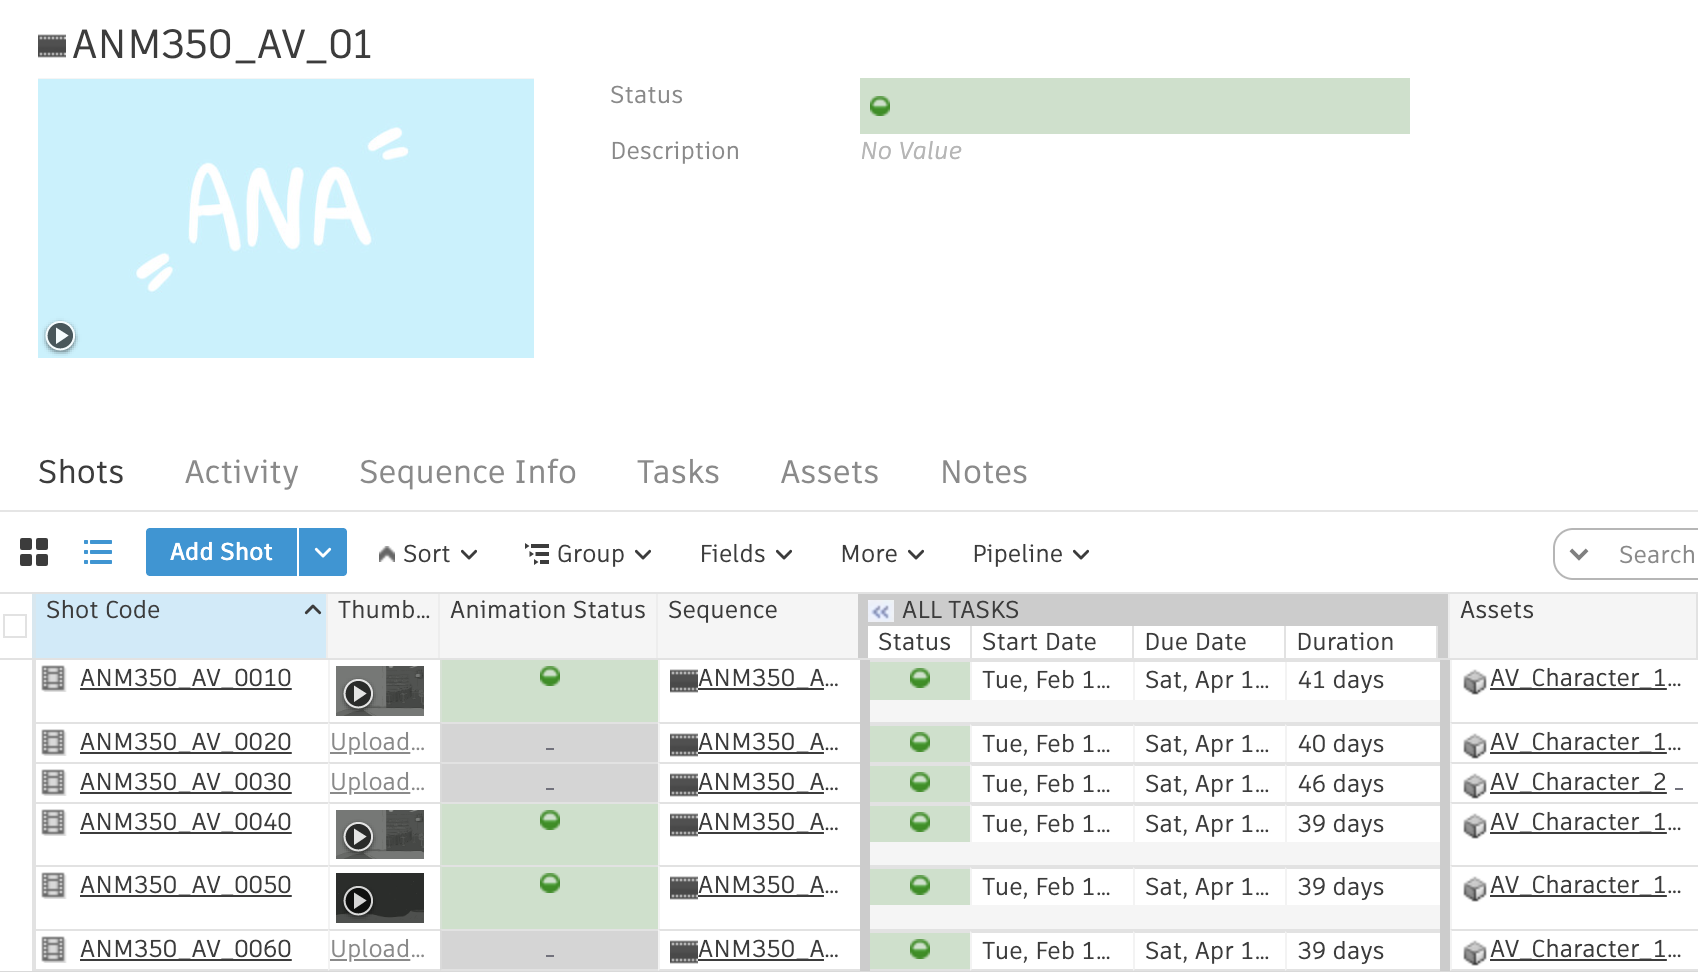
Each student has their own sequence, identifiable by their names in the thumbnails. You will notice that some students have two sequences: this module allows for students to create two final outcomes if they would like, so this second sequence is for anybody working on two completely separate outcomes, such as a layout sequence and an unrelated animation.
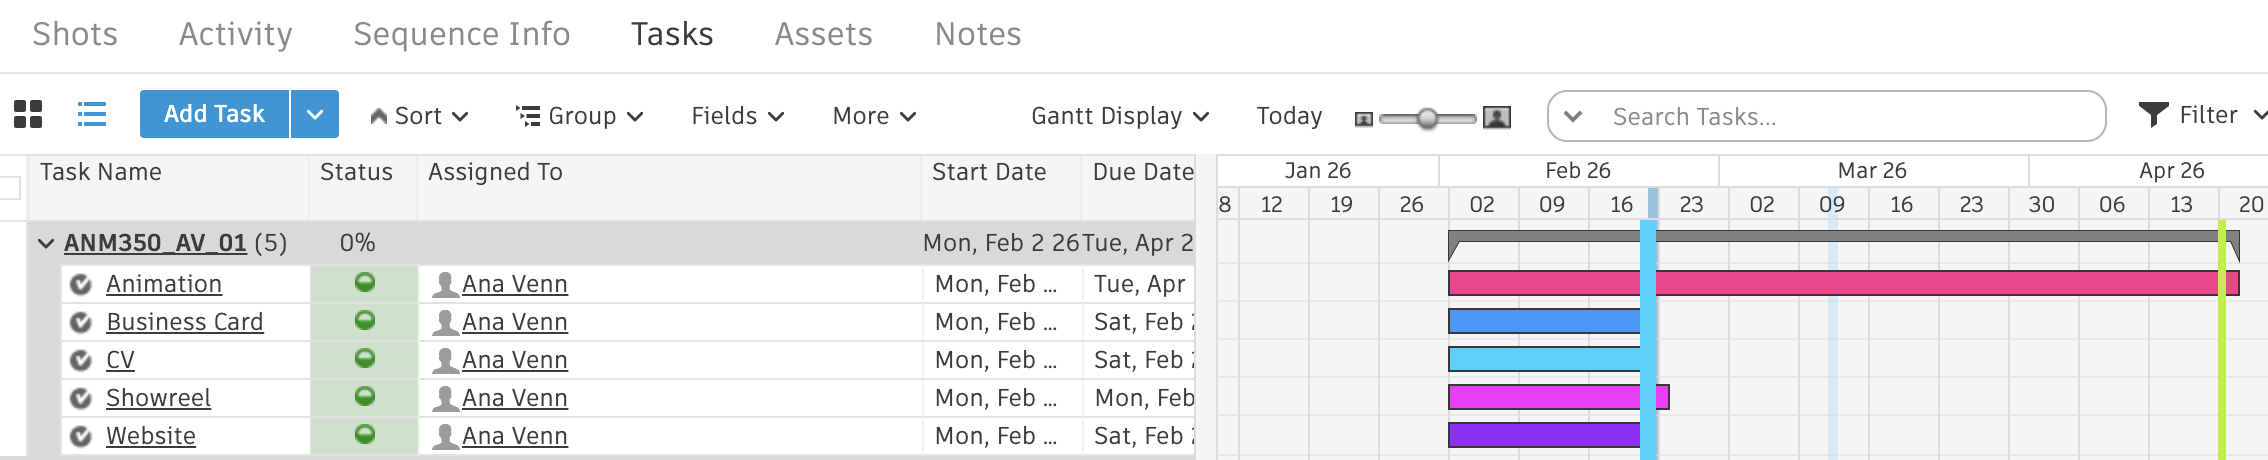
Within each sequence, the artists can find their shots (if relevant to their specialism) as well as any related assets – characters and props, in most cases. The majority of tasks are nested within shots and assets, but I have assigned some tasks to the sequence as a whole: these being each person’s final outcomes that they will need for their hand in at the end of the module. As part of our hand-in involves making a business card, CV, website etc, I created these tasks with the idea that it would act as an easy place for students to upload their progress versions of these elements for the module. For students with multiple sequences, these tasks are always associated with their first sequence.
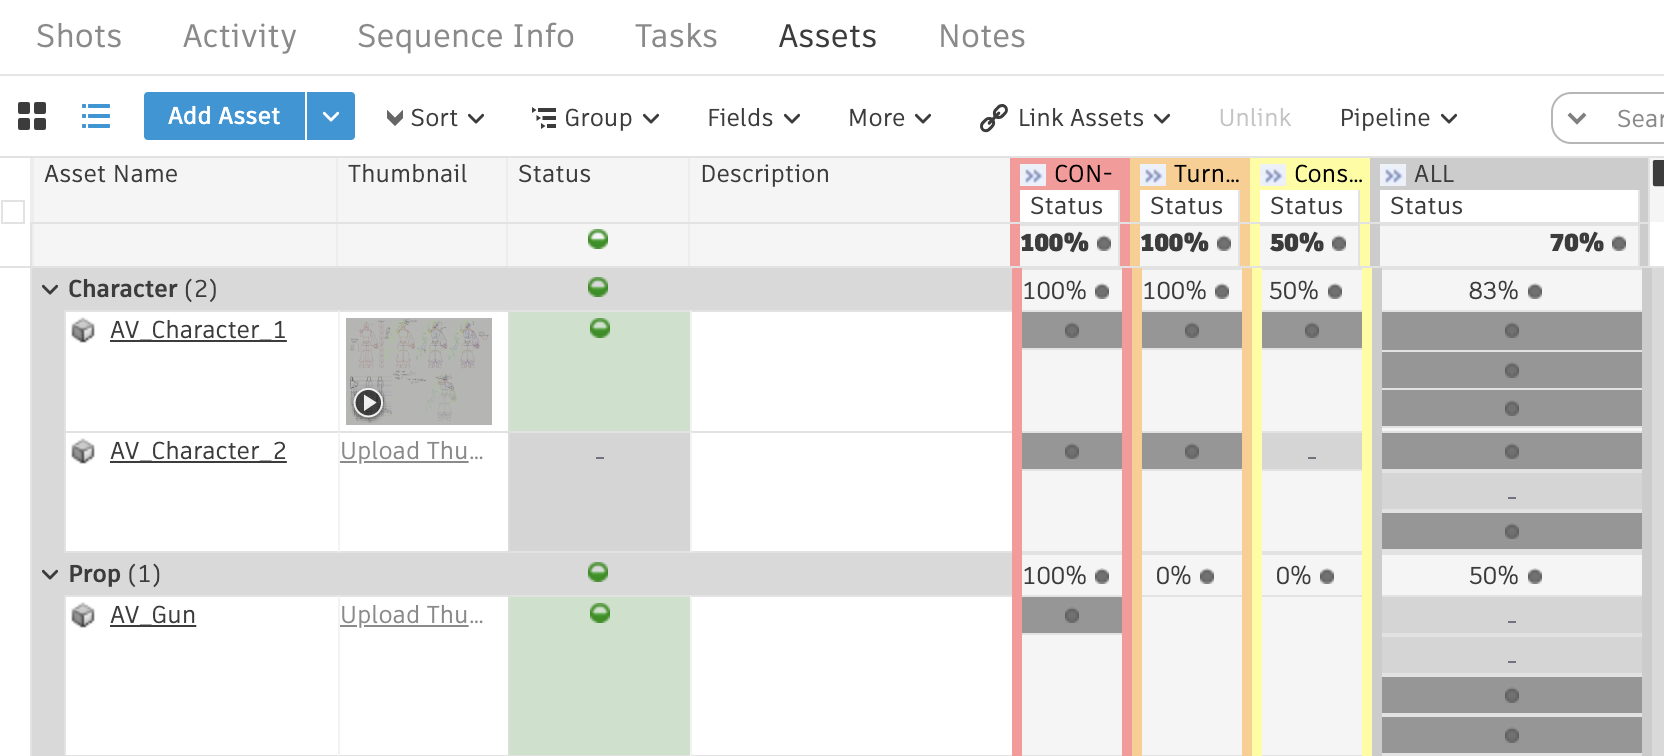
Assets and Shots
Assets and shots both function how you might expect them to, with the exception that I’ve broken down the tasks more than is typical: for example, I’ve separated animation into keys, inbetweens, and cleanup. This is less for my benefit and more for the benefit of the students I’m working with. Quite a few of them self-admittedly struggle with getting their work done due to feeling overwhelmed – which is why they wanted to be produced, I assume! – and so I’ve separated tasks in this way so that they will find the work more manageable. The workload is the same regardless, of course.
Schedules
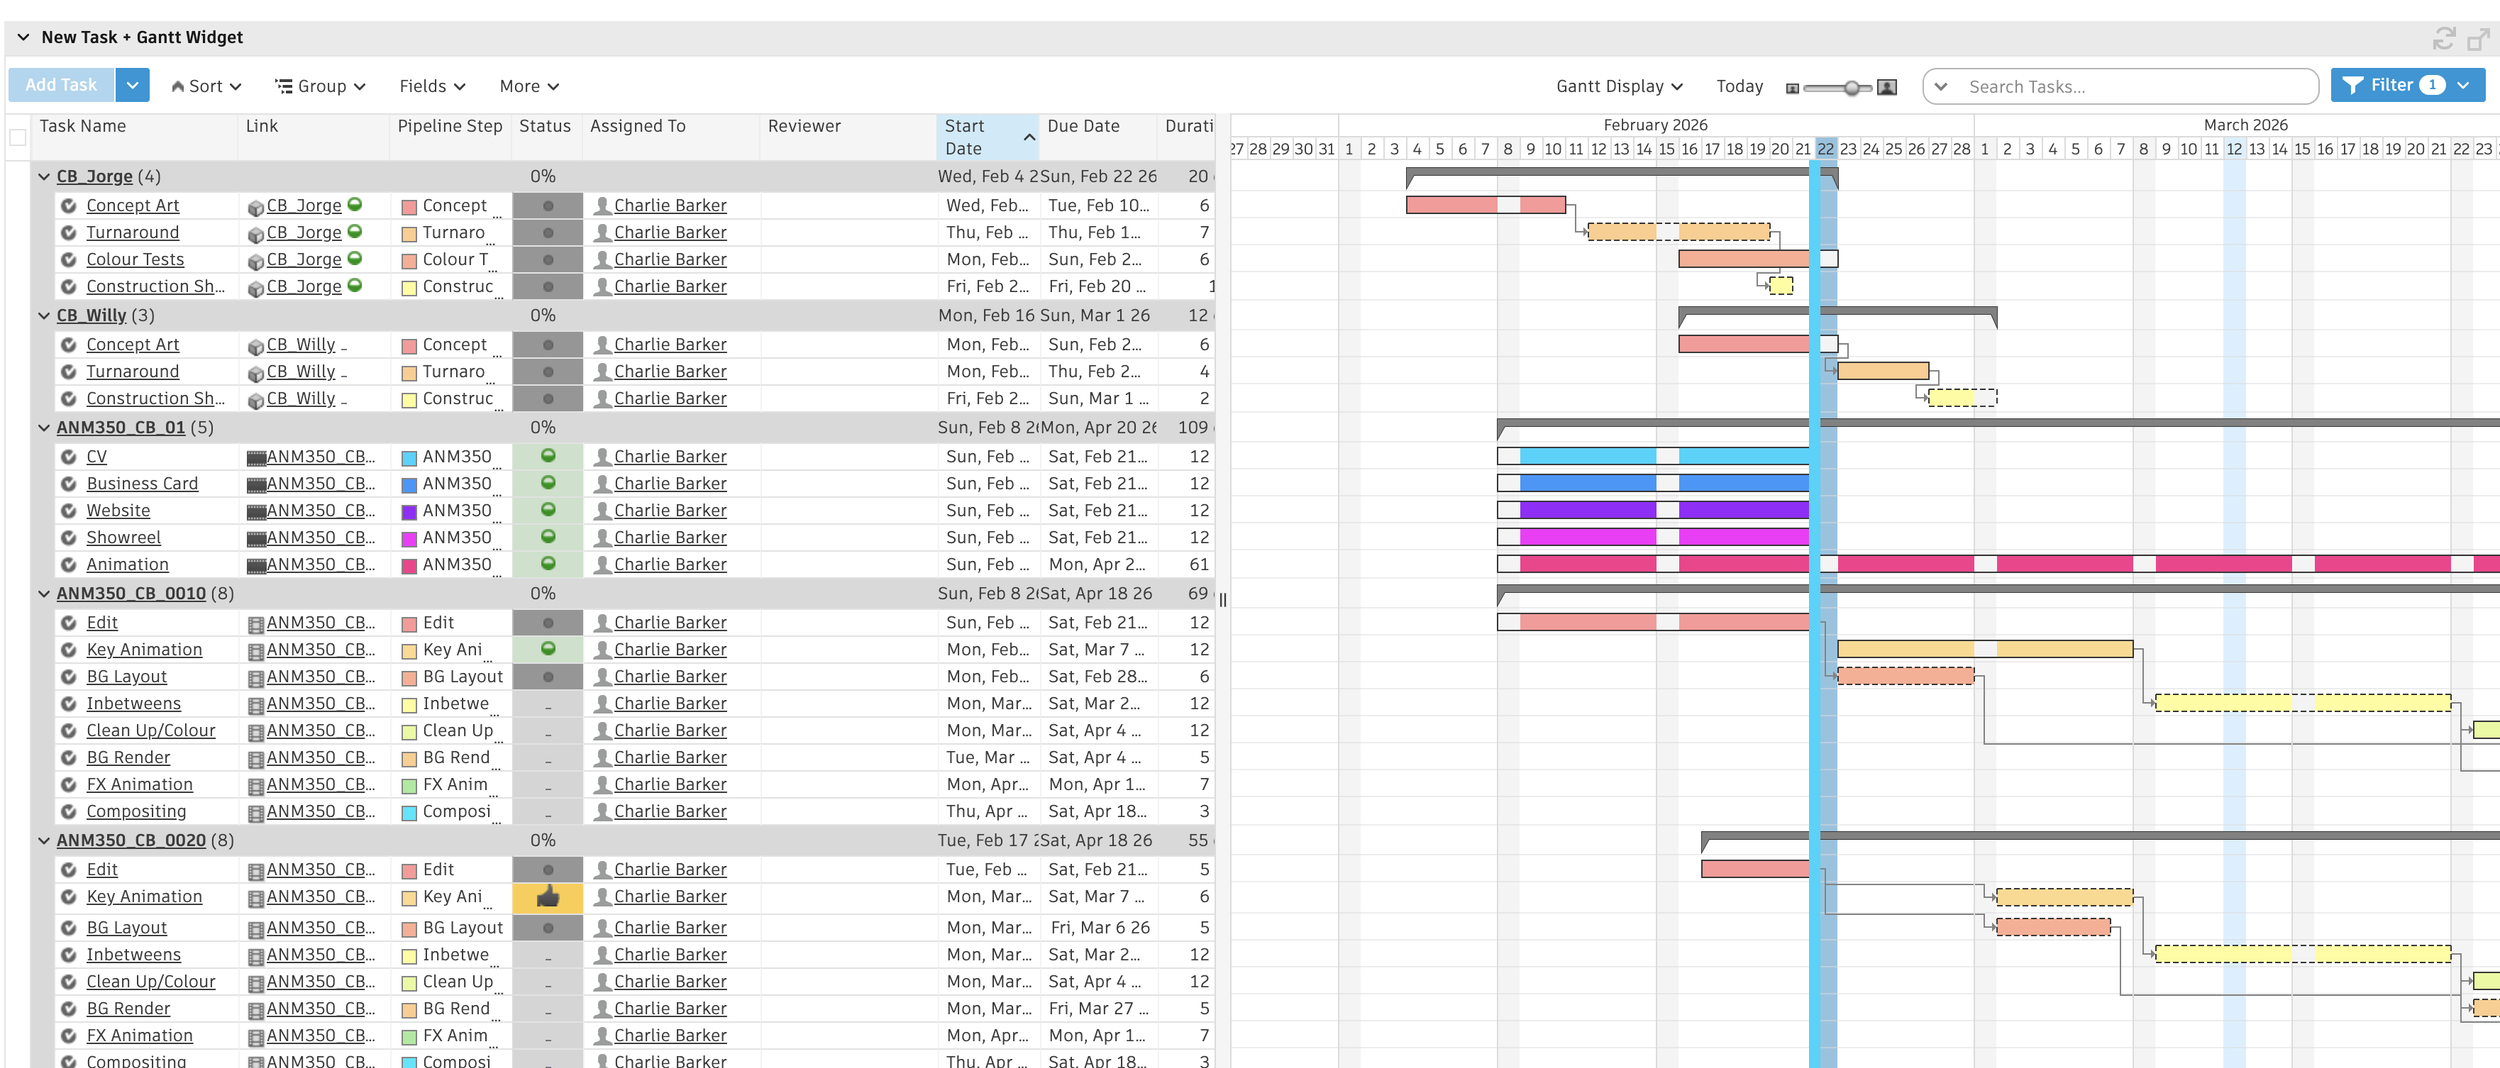
For everybody to be able to view their timeline chart for their project, I set up a ‘personal’ view for the schedules and tasks tab to display only the user’s assigned tasks. Everybody has a different timeline, adjusted for their individual project and skillset. From my end, I go in and look at everybody’s Gantt chart through the ‘people’ tab.
Final Thoughts
Although it is unlikely that I’ll ever use Flow in this manner again, I do believe that tackling such an unusual task with it has, in turn, acquainted me far better with the software than something conventional would. It’s clearly an incredibly powerful software, and I can really see its benefits within the workspace. I only wish that I were working on something that would utilise its feedback and redlining features, as having researched these they seem brilliant!
Other things I’m doing as part of this module includes weekly meetings with artists, reaching out to musicians for collaboration enquiries, note taking at progress screenings for ten different films and, to be honest, a lot of chasing people up! But that’s the name of the game when you’re producing – at least at a junior level.
Above all, I’m grateful for the opportunity to work with such a range of different personalities. I truly believe that so much of a producer’s job revolves around people skills, and I’ve enjoyed the challenge of finding how to draw the best out of each individual student I am working with.